Tuesday, September 30, 2014
How to Hard Reset LG G Flex Using Buttons
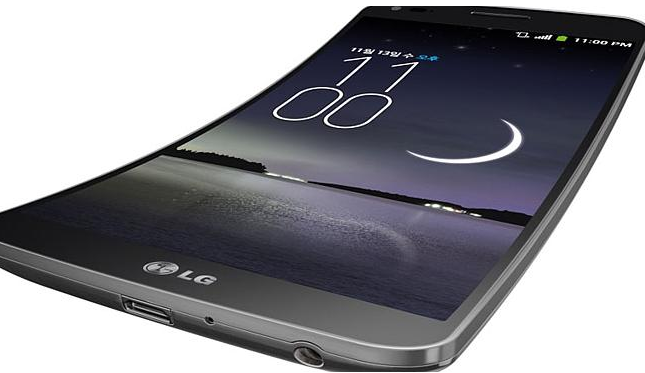
Restoring the default settings or factory reset your LG G Flex will delete all your existing files. It is recommended to backup your important files on your computer before attempting to reset your device.
1. Switch off your device. If it is frozen, remove your battery and insert it again.
2. Press and hold the following keys: Volume Down Key + Power/Lock Key.
3. Release the keys as soon as Recovery mode is displayed.
4. Press the Volume Down Key to scroll to wipe data/factory reset. Then press the Power/Lock Key to select it.
5. Press the Volume Down Key to scroll to Yes -- delete all user data. Then press the Power/Lock Key to select it.
6. The phone will perform a factory reset.
7. Make sure that reboot system now is highlighted and press the Power/Lock Key to make the selection and reboot your phone.
How to Turn On Off Wi Fi on Alcatel One Touch 993D
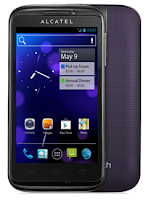
Follow these steps on how to connect to your wireless network:
• On your Home Lcd, tap on the Menu key.
• Select on Settings.
• You will see a Wi-Fi option, beside on the Wi-Fi, just switch whether on/off.
• Tap on Wi-Fi, there should a detailed information of detected wireless networks.
• Tap on the network you want to connect with.
• If the network is secured with a password, make sure to enter the password correctly.
• Then tap Save.
How to Setup an Email Account on Alcatel One Touch 993D

How to setup your an email, follow these steps:
• On your HomeLcd, touch on the Application tab.
• There should an email wizard that will guide you through process in setting up an email.
• Enter the email address and password of the account you want to set-up.
• Then tap Next. (You will be prompted to go to email account settings to enter settings manually, if the account is not provided by your service provider.)
• You can also tap on Manual setup to directly enter the incoming and outgoing settings for the email account you are setting up.
• Enter your preferred account name and display name in outgoing emails.
• If you want to add another email account, just tap on Menu key > Settings > Add Account on the right of the title to create.
Excellence of Windows 8
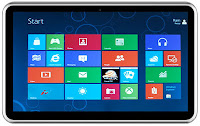
Before using one of these operating systems, there is a good friend of his understanding of all shortcomings and advantages of the latest Windows 8 operating system, here I will discuss a bit of advantages and disadvantages ofWindows 8.
Excellence:
1. Optimize for a touch screen
Windows 8, interface who has been dubbed the Metro is really optimized for a touch interface with an existing Windows Phone.
2. support the ARM chip
Windows 8 supports devices that use the infrastructure of the ARM chip. It is expected to extend the reach of Windows 8 tablet at the arena, considering most tablets in circulation currently wearing the ARM chip.
3. a short boot time
Boot Windows 8 in demo only takes place in 8 seconds. A much shorter time than booting in earlier versions of Windows.
4. Windows 8 do not need to upgrade PC
Microsoft says computers that can run Windows 7 can also run Windows 8 so that users do not have to upgrade your PC. According to Microsoft, Intel Atom processor and 1 GB of RAM is sufficient for running this OS
5. Store Windows application Store
Windows 8 will have its own application store called Windows Store. Windows Store provides a wide range of applications optimized for Windows 8.
6. support of NFC (Near Field Communications)
Windows 8 will support the NFC, a technology that use among others for financial transactions. Windows 8 Tablet wearing any likely will automatically include this feature.
Weaknesses:
1. overlapping Metro UI and Aero UI.
Developers find the existence of constantly switching between tile-based Metro UI and glassy Aero UI. It is judged to be reasonable and very confusing. Switching from application and desktop application is very hard to do.
2. There is no option to change the tiles become icons.
The size of the tiles to the smallest, it is still too large. When would we install many applications then this screen will look chaotic Metro.
3. difficult to switch between screens.
The absence of Alt-Tab function, such as when working with the desktop and keyboard to switch from one app to another app that is probably the thing that is very difficult. Instead, Windows 8 Metro UI we cannot use a pointer or finder to put a screen on the left side and drag. It sounds very trivial, but the problem will appear when we work with many applications. There is no quick and easy way to switch between applications. If moving the mouse towards the left then an icon will pops up. And if not then we have to right click it a few times or try again.
4. Metro multitasking.
If the application uses PAL Metro (for tablets) in Windows 8, the screen will display the two applications are lined up. For beginners it will not be a big problem. However for the advanced user, multitasking capabilities with Metro just for the two applications is a fatal weakness.
5. Metro.
Metro can indeed work well on tablets but the UI is not compatible if used on the desktop. Hard to do for a friend who uses a Notebook. So that by default Windows 8 might not be booting to the Metro UI. In other words Microsoft needs to provide the kill-switch to shut down the Metro UI.
6. Flash content on the Tablet PC.
It turns out Microsoft deliberately make Windows 8 does not support Flash content on the Tablet PC. The reason Microsoft is doing this is to save battery the Tablet. Moreover, it also can protect the privacy of our Tablets and increase security. This is because in some applications and other electronic devices, the use of Flash content thus cause data damage or crash.
Maybe it used to be that I can create all of your info right, may be useful.
Monday, September 29, 2014
How to Find the ESN on a phone HTC EVO
Find the ESN for your HTC EVO is a good idea if you need to reprogram the phone . The ESN or electronic serial number is a unique number that identifies mobile phones. The ESN is usually printed under the battery of the EVO , but you can find the number without the need to remove the battery cover of the phone and battery. The ESN is conveniently located in the phone settings.
Instructions
Read More..
Instructions
- Touch the "Menu" key on the HTC EVO and then tap the icon "Settings" .
- Scroll down to the last field and click " About phone " .
- Tap " Phone Identity " and review the information in the phone . The ESN MEID is the same number listed for the HTC EVO .
How to Backup and Factory Reset Alcatel One Touch 993D

Luckily in Alcatel One Touch 993D you can backup your phone settings and other application data to Google Servers before wiping all the data on your phone. But if you want to erase all the content on your phone, then there’s no need for you to backup your data.
How to Activate the Backup Function:
• Tap on the Menu key from Home Lcd.
• Select Settings > Backup & reset > Back up my data.
• Then mark the checkbox.
How to Factory Reset:
• Tap on the Menu key from Home Lcd.
• Select Settings > Backup & reset > Factory data reset.
• Then mark the checkbox.
If you are unable to turn on your Alcatel One Touch 993D, then you may need to do the hard reset. Press and hold the Volume up key and the Power key at the same time until the Lcd light up. This process will also factory reset your device.
How to Extend Battery Life of HTC One Evo 3D
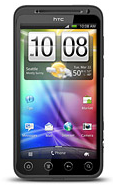
Battery Life depends on how you use your device. For HTC One Evo 3D device, if you want to save your battery to last longer hours, you may need to adjust your settings. Follow these suggestions:
• Turn on the power-saving option on the device. Then lessen the Lcd brightness and the Lcd lock timeout.
1. On your Home Lcd, press the Three Horizontal Line icon.
2. Select Settings, and.tap Power.
3. Choose the Enable power saver check box.
4. Tap to turn power saver on.
5. Tap Power saver settings, and then set and select the behavior when HTC EVO
3D switches to power saving mode.
• Turn down your device volume with the volume keys.
• Close any apps or features when you are done using it so they will not continuously running in the background.
• Turn off the network connection if you are out of range so that your device will stop searching for a network signal.
• You should use the latest version of the software update. Software updates improves some features and fixes some bugs on the previous software version.
• Turn off the camera flash.
• The camera viewfinder can be a power drain, so after youve finished taking photos.
CorelDRAW X6 Download
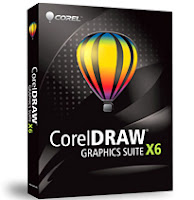
CorelDRAW is a vector-based graphics processing program which has been very popular among computer users. His latest version, CorelDRAW X6 or CorelDRAW Corel Corporation16 has been launched at the end of March 2012. This Software is bundled into CorelDRAW Graphics Suite X6.
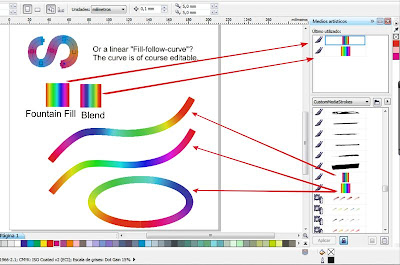
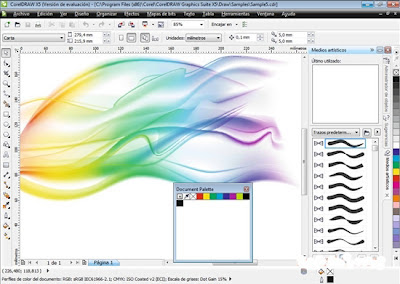
New features offered in the bundle of CorelDRAW Graphics Suite X6 inter alia support OpenType, typografi tool Color Harmonies, Shaping tools, Object Styles.
Additional Software such as Corel Website Creator X6 is a new thing that came in the bundle X6. In addition there are additional software that is already known, like previous versions of user PhotoPaint PowerTrace x 6, X 6.
Graphic design application CorelDRAW X 6 can be run on Windows XP, Windows Vista, and Windows 7. The computer has at least use spek Intel Pentium 4 or equivalent, 1 GB memory, screen resolution 1024 x 768 pixels, as well as DVD drives and blank hard drive capacity at least 1.5 GB for installation.
CorelDRAW Graphics Suite X6 Reviews:
Category Software: Graphic Design
Provider: Corel Corporation
Price: $ 499 USD
Each new version CorelDRAW indeed worth the wait!
Advantages:
Benefits and capabilities of CorelDRAW indeed does not need to be questioned again. This Software is the de-facto standard software has become in the world of graphic design. Some additional new features are certainly going to get easier for the designers in the work. New Website Creator Software that are included in bundle X6 Graphics Suite X6 seems to be also interesting to try.
Disadvantages:
Enhanced version of CorelDRAW usually also situational needs improvement computer systems. By using the same computer, the new version feels more CorelDRAW weight. It does make some graphic designers prefer to use the old version already suffice the needs of graphic design.
You can download CorelDRAW X6 free here
How to Set Up Voicemail on Huawei Ascend G615
1. On your devices homeLcd touch
 and go to Settings.
2. Select Voicemail settings.
3. Tap on Voicemail number and enter your voicemail number.
4. Then tap on OK.
To listen to your voice messages, just press and hold the number 1 on the dialer and follow the instructions.
Sunday, September 28, 2014
How to Factory Reset Hard Reset HTC One Evo 3D

Resetting HTC One Evo 3D on Settings:
- Slide the Notifications panel open, and then tap the Gear Icon or Settings.
- Select SD & Phone storage.
- Tap Factory data reset.
- If you want to delete all your files, then tap Erase everything.
These steps is also helpful when your HTC One Evo 3D is unresponsive or frozen and theres no way to access the settings.
- First, press and hold the Volume Down button, and then do the same way on the Power button.
- Hold the two buttons until the three Android images appear on the Lcd.
- Release the button when the three Android images appear and press Volume Down.
- Tap on Factory Reset, and then press the Power Button to confirm.
How to Add Remove Resize Widgets and Shortcuts on Motorola Atrix HD
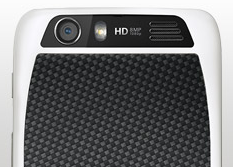
To add a Widgets and Shortcuts:
- Go to Apps.
- Tap and hold on the app or widget.
- Drag it to one of your home Lcd pages.
- If you want to see all your apps and widgets, swipe the app Lcd to the left.
- Or you may also tap Apps or Widgets at the top.
- If you want to see all your favorite apps, just tap on the Star icon or Favorites.
- Tap on Add/Remove to edit your favorite apps.
There are also app that include special widgets. If you want to download apps, just tap on Apps, then select Play Store.
To resize widgets:
- Some widgets are resizeable, simply tap and hold on a widget you want to resize until it vibrates.
- Then drage the blue diamonds at the edges to change the size.
To move or delete widgets and shortcuts:
- Tap and hold on a widget you want to delete/move until it vibrates.
- Then drag it to another spot/page, you simply Remove at the top of the Lcd.
How to Take Continuous Camera Shots on HTC Desire U
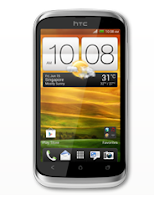
Follow these steps:
1. First, make sure that youre in Normal scene to use this feature.
2. On the Viewfinder Lcd, just press and hold on
 .
.- It should take 20 consecutive shots since it is the default settings.
- If you want to capture more than 20 shots, just tap on the Gear Icon or Settings, then Continuous shooting. After that, clear the Limit to 20 frames option.
3. You can also select the photo that you like most by tapping Best shot. If you dont want the other photos, then you can delete it.
How to Factory Reset Hard Reset LG Lucid 2
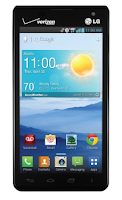
Restoring the default settings or factory reset your LG Lucid 2 will delete all your existing files. It is recommended to backup your important files on your computer before attempting to reset your device.
The steps below are the instructions on how to factory reset your LG Lucid 2:
Step 1. On your HomeLcd, tap on MENU icon.
Step 2. Select Settings, then select Backup & Reset option.
Step 3. Under Personal Data, tap on Factory Data Reset.
Step 4. Read warning carefully before tapping the Reset phone.
Step 5. If you want to proceed in resetting your device, tap on Erase Everything to confirm the Factory Reset.
Now, you just need to wait while your device is resetting. It should reboot itself and you will have a new start on your LG Lucid 2.
If your LG Lucid 2 is unresponsive, then you may need to do the Hard Reset.
- Press and hold the Power button/Lock Key and Volume Down Key at the same time.
- Hold these buttons until you see the Factory Hard Reset.
- Press the Power Key continue or the Volume Keys to cancel.
- Press the Power Key again to confirm the factory reset, or the Volume Keys to cancel.
- Wait for a few minutes while your phone performing the hard reset. It will turn on in a while.
How to Add or Remove Widgets on Motorola Atrix 2
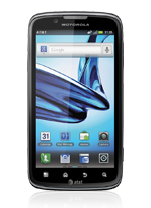
Adding Widgets on your HomeLcd will help you improve your productivity in using your Motorola Atrix 2. If you dont know what widgets means, Widgets are small applications that you can directly use on your HomeLcd. These will serve as your shortcut icon so will no longer need to access the Menu.
To add a Widgets:
There are also app that include special widgets. If you want to download apps, just tap on Apps, then select Play Store.
To move or delete widgets:
To add a Widgets:
- Go to Apps.
- Tap and hold on the widget.
- To change your wallpaper, tap and hold an empty spot on the home Lcd.
- You can also add a folder to organize your shortcuts.
There are also app that include special widgets. If you want to download apps, just tap on Apps, then select Play Store.
To move or delete widgets:
- Tap and hold on a widget you want to delete/move until it vibrates.
- Then drag it to another spot/page, or simply Remove at the top of the Lcd.
Saturday, September 27, 2014
Sony Mobile unveils Xperia miro and Xperia tipo
Sony Mobile unveils Xperia miro and Xperia tipo – stylish, fun and easy to use smartphones
Xperia miro provides deep Facebook integration and Sony’s xLOUD audio technology in a slim and stylish design
Xperia tipo comes in both single and dual SIM version for consumers looking for value and functionality
Both smartphones launch on latest Android™ platform - Ice Cream Sandwich
13 June, London, United Kingdom – Sony Mobile Communications (“Sony Mobile”) today announced two new Xperia™ smartphones, Xperia miro and Xperia tipo. Xperia miro is a slim and stylish smartphone available in a fun range of colours with deep integration of Facebook™ throughout contacts, photo gallery and the music player, plus Sony’s xLOUD™ audio technology for crisp and loud sound. Xperia tipo is designed to be easy to use enabling consumers to get the most from their smartphones – whether browsing the web, sharing pictures or downloading apps. Xperia tipo will also be available in a dual SIM version – Xperia tipodual – so that consumers can switch between tariffs with just one touch to stay on the most cost effective plan. Both smartphones will launch globally in calendar Q3 2012.
“Xperia miro and Xperia tipo are for consumers looking for entertainment experiences and functionality traditionally associated with high-end Android smartphones”, said Calum MacDougall, Director Xperia Marketing at Sony Mobile Communications.” “Xperia miro is for those who want an integrated social media and a great music experience while Xperia tipo is for consumers who want to realise the benefits of a smartphone for the first time as they migrate from a feature phone.”
Xperia miro – the fun social smartphone from Sony
Xperia miro is a slim, stylish smartphone with Facebook social experiences integrated throughout. Users are alerted to new incoming messages and social updates with colourful illuminations, and can easily video chat with friends using the front facing camera. To provide great music entertainment it integrates Sony’s xLOUD audio technology, giving crisp and loud sound. Xperia miro comes pre-installed with Music Unlimited* from Sony Entertainment Network, providing instant access to millions** of music tracks on the move.
Key features for Xperia miro
3.5” display for great browsing and entertainment experiences
Launching on Android 4.0 (Ice Cream Sandwich)
5MP camera and brilliant quality video recording at 30fps
Sony’s xLOUD audio technology gives crisp and loud sound
Deep Facebook integration with contacts, gallery and the music player for sharing and discovery
Customisable illuminations for incoming messages and social updates
Front-facing camera for video chat between smartphones, tablets and PCs
Contactless DLNA connectivity to easily view content like photos and videos on a TV, tablet and PC
Powerful battery with >24hrs usage time
Available in black, black/pink, white and white/gold colours
Xperia tipo – the affordable and easy to use smartphone
Xperia tipo offers a simple and easy to use smartphone experience targeting consumers who may be purchasing their first smartphone. With a dedicated set-up guide, a built-in application enabling users to monitor their data usage, excellent battery life and the latest Android platform – Ice Cream Sandwich – consumers can make the most of their smartphone experience.
Key features for Xperia tipo
3.2” scratch-resistant mineral glass display
Launching on Android 4.0 (Ice Cream Sandwich)
3.2MP camera
Dedicated set-up guide
Data management solution to identify data usage
Bluetooth and Wi-Fi™ for easy content sharing and web access
Powerful battery, 1500 maH, with >24hrs usage time
Available in red, white, blue and black
*Sony Entertainment Network services are subject to availability by region, please see www.sonyentertainmentnetwork.com for more details. **The number of available songs varies by region.
| All services mentioned may not be available in every market. | ||
| Xperia miro | Xperia tipo | |
| Colours | Black Black pink White White gold | Classic black Classic white Deep red Navy blue |
| Facts | Size: 113 x 59.4 x 9.9 mm Weight: 110 grams Operating system: Google Android™ 4.0 (Ice Cream Sandwich) Processor: 800 MHz Qualcomm MSM7225A | Size: 103 x 57 x 13 mm Weight: 99.4 grams Operating system: Google Android™ 4.0 (Ice Cream Sandwich) Processor: 800 MHz Qualcomm Snapdragon™ MSM7225AA |
| Camera | 5 megapixel camera 4x digital zoom Auto focus Flash/Photo flash Flash/Photo light Front-facing camera (VGA) Geotagging Self-timer Send to web Touch capture Video light Video recording | 3.2 megapixel camera 4x digital zoom Geotagging Self-timer Send to web Touch capture Video recording |
| Music | Album art Bluetooth™ stereo (A2DP) Manual equalizer Walkman™ player PlayNow™ service TrackID™ music recognition xLoud™ Experience | Album art Bluetooth™ stereo (A2DP) PlayNow™ service Music Player TrackID™ music recognition application xLoud™ Experience |
| Internet | Bookmarks Google Play™ Google™ search Google Voice™ Search Google Maps™ for Mobile with Street view and Latitude™ NeoReader™ barcode scanner Web browser (WebKit™) | Bookmarks Google Play™ Google™ search Google Voice™ Search Google Maps™ for mobile with Street View and Latitude™ NeoReader™ barcode scanner Pan & zoom Web browser (WebKit™) |
| Communication | Call list Conference calls Facebook™ application Xperia™ with Facebook™ Friends application Google Talk™ application Google Talk™ video chat Multiple IM Speakerphone Twitter™ (Timescape™ integration) Video chat ready Xperia™ Timescape™ | Call list Conference calls Facebook™ application Google Talk™ Speakerphone |
| Messaging | Conversations Gmail™ Handwriting recognition Instant messaging Multimedia messaging (MMS) Predictive text input Text messaging (SMS) | Conversations Gmail™ Handwriting recognition Instant messaging Picture messaging (MMS) Predictive text input Text messaging (SMS) |
| Design | Auto rotation Gesture input On-screen 12-key keyboard On-screen QWERTY keyboard Picture wallpaper Touch screen Wallpaper animation | Auto rotate Keyboard (on-screen, 12 key) Keyboard (on-screen, QWERTY) Picture wallpaper Touch screen Wallpaper animation |
| Entertainment | 3D games Media browser Motion gaming Radio (FM radio with RDS) Sony Entertainment Network Video streaming YouTube™ | 3D games Media browser Motion gaming Radio (FM radio with RDS) Sony Entertainment Network Video streaming YouTube™ |
| Organiser | Airplane mode Alarm clock Calculator Calendar Contacts Document readers eCompass™ E-Manual Infinite button Notes Tasks Setup Wizard | Alarm clock Airplane mode Calculator Calendar Contacts E-Manual Infinite button Setup Wizard |
| Connectivity | 3.5 mm audio jack (CTIA) aGPS Bluetooth™ wireless technology DLNA Certified® Media Transfer Protocol support Micro USB support Native USB tethering Media Go™ PC Companion Synchronisation via Facebook™ Synchronisation via SyncML™ Synchronisation via Google™ Synchronisation with computer Synchronisation via Microsoft® Exchange ActiveSync® USB High speed 2.0 support USB mass storage Wi-Fi® Wi-Fi® Hotspot functionality | 3.5 mm audio jack (CTIA) aGPS Bluetooth™ wireless technology Media Transfer Protocol support Micro USB support Native USB tethering Synchronisation via Facebook™ Synchronisation via Google™ Sync Synchronisation via Exchange ActiveSync® USB High speed 2.0 support USB mass storage Wi-Fi® Wi-Fi® Hotspot functionality |
| Display | 3.5” 320 x 480 pixels 16,777,216 colour TFT Scratch-resistant glass | 3.2” 320 x 480 pixels 262,000 colour TFT Scratch-resistant mineral glass |
| Memory | Internal phone storage: 4 GB (up to 2.2 GB user-accessible memory)* Expansion slot: microSD™, up to 32 GB | Internal phone storage: 2.9 GB (up to 2.5 GB user-accessible memory)* Expansion slot: microSD™, up to 32 GB |
| Networks | UMTS HSPA 900 (Band VIII), 2100 (Band I) GSM GPRS/EDGE 850, 900, 1800, 1900 UMTS HSPA 850 (Band V), 1900 (Band II), 2100 (Band I) GSM GPRS/EDGE 850, 900, 1800, 1900 | UMTS HSPA 900 (Band VIII), 2100 (Band I) GSM GPRS/EDGE 850, 900, 1800, 1900 UMTS HSPA 850 (Band V), 1900 (Band II), 2100 (Band I) GSM GPRS/EDGE 850, 900, 1800, 1900 |
| Battery life | 1500 mAh typical, 1460 mAh minium Talk time GSM: Up to 5 hrs** Standby time GSM: Up to 470 hrs** Talk time UMTS: Up to 6 hrs** Standby time UMTS: Up to 545 hrs** Music listening time: Up to 36 hrs 30 min Video playback time: Up to 8 hrs | Battery: 1500 mAh Typical, 1460 mAh Minium Talk time GSM: Up to 5 hrs** Standby time GSM: Up to 470 hrs** Talk time UMTS: Up to 4.5 hrs** Standby time UMTS: Up to 545 hrs** Music listening time: Up to 30 hrs Video playback time: Up to 3 hrs |
| In the kit | Xperia™ miro, battery, charger, micro USB cable for charging, synchronisation and file transfer, and user documentation. | Xperia™ tipo, battery, charger, micro USB cable for charging, synchronisation and file transfer, and user documentation. |
* Internal phone storage comprising 1GB System memory used for firmware, 766MB Phone memory for downloaded applications, and 2.2 GB Internal storage used for music, pictures, movies, and some application data
**Values are according to GSM Association Battery Life Measurement Technique. Battery performance may vary depending on network conditions and configurations, and phone usage.
(Source: Sony press)
Canon iP2770 Blink 16x Reset
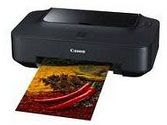
This time will be sharing experience about Canon iP2770 Blink Orange 16x. This case may be quite confused if youve never experienced it. OK lets see together.
Early indications:
When the printer is turned on appears to be OK, but after the print command,
then the Canon iP2770 will Blink Orange 16x. This case occurred well after you reset the Printer iP2770. The following image is displayed on the monitor screen:
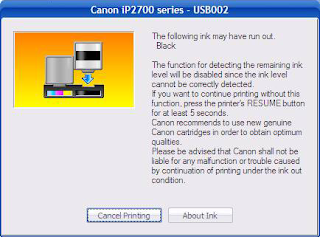
How to troubleshoot a Canon iP2770 Blink Orange 16x:
- Run the command print, you can print just about anything, and then it will blink iP2770 16x.
- If it appears Canon iP2770 Blink Orange 16x, meaning the color cartridge iP2770 need reset (experience the run out).
- The solution: press the resume button somewhat longer until the green light flashes, then release.
- If the Canon iP2770 Blink Orange 16x again, meaning black cartridge also need reset (experience the run out)
- The solution is the same: press the resume is rather long until green light flashes, then release.
- Printer Canon iP2770 Blink Orange 16x your print command will print and iP2770 will return to normal.
This often happens when the cartridge out finished refilled then installed again, also occurs after you perform a reset on ip2770.
Good luck.
Nokia introduces new range of mobile phones to provide a fast affordable internet experience
Published May 15, 2012 | By Nokia - Press Release
Nokia 110 and Nokia 112 offer Facebook, Twitter, world-class EA games and access to thousands of apps from the Nokia Store
| Nokia 110 |
Karachi, Pakistan - Nokia has today unveiled two new mobile phone models as it continues to accelerate its strategy to connect the next billion consumers to information and the internet. The Nokia 110 and Nokia 112 have been designed to appeal to young, urban consumers who want to experience a fast, affordable online experience.
Both devices are perfect for communicating across Facebook, Twitter and social media networks. The internet experience is also smooth thanks to the Nokia Browser. This innovative technology allows users to consume less data by up to 90%, by compressing websites in the cloud. Both devices offer direct access to Facebook and Twitter from their home screens. The Nokia 112 also features preloaded eBuddy instant messaging service right out of the box, so users can use popular chat services to keep conversations going 24/7.
In common with other Nokia mobile phones, consumers can choose from thousands of apps to download on the Nokia Store. With the upgraded camera, they can now customize their contacts with pictures, and share them with friends via social networks and Bluetooth.
"Todays mobile phone users want a quick internet experience that allows them to discover great content and share it with their friends - but without being held back by high data costs," said Mary T. McDowell, executive vice president, Mobile Phones, Nokia. "The new Nokia 110 and Nokia 112 devices combine browsing, social media, apps, world-class entertainment and long battery life to create a great package for young, urban consumers who want to do it all."
| Nokia 112 |
The devices all feature a generous 1.8" display optimized for a great gaming experience. In the coming months, the Nokia 110 and Nokia 112 will bring free* 40 key EA Games, valued at EUR 75 if bought separately, including well known titles like Tetris®, Bejeweled®, Need for Speed(TM) The Run, Monopoly Here & Now, and SimCity(TM) Deluxe. Consumers will be able to easily access the content by clicking on the Games Gift EA icon on their home screen which will take them to the Nokia Store to download the games. Once they have accessed the offering, they will have 60 days to download the games of their choice, keeping the games forever.
Both new phones offer an improved VGA camera for sharp and clear pictures with support for up to 32GB of external memory, enough for more than 6000+ songs or 90,000 pictures. Consumers can tune into their favorite radio stations and share their favorite songs with friends over Bluetooth. The phones have been optimized to provide a long-lasting battery life, with over 10 hours of talk time and nearly a months standby, meaning that consumers can stay in-touch and entertained all day long. Dual SIM capability
The Nokia 110 and Nokia 112 are both Dual SIM phones, featuring the benefits of Nokias unique and industry leading Easy Swap technology. This enables users to switch between SIMs quickly without having to remove their battery or turn off their phone. The Easy Swap technology can personalize and remember up to five different SIM cards, giving consumers full control over their costs.
The Nokia 110 will also be available as single SIM versions - Nokia 111 and Nokia 113, with this last one available in Europe and Eurasia only.
The estimated retail price for Nokia 110 and its single SIM versions is about EUR 35 and they are expected to start shipping in the second quarter of 2012. The estimated retail price for Nokia 112 is about EUR 38, excluding taxes and subsidies, and is expected to start shipping in the third quarter of 2012.
Labels:
a,
affordable,
experience,
fast,
internet,
introduces,
Mobile,
new,
Nokia,
of,
phones,
provide,
range,
to
Intel Core i3 i5 and i7 Review
The current notebook that uses the latest Intel processors have started using the Intel Core i family. There are named Core i3, Core i5, and Core i7 processors. These three are the official replacement from the ranks of Intel Core2 processors (dualCore, Core2 Duo, Core2 Quad). Any improvement offered by the Core i? We will try to explain as simply as possible about the new line of notebook processors.
Nehalem
All Intel processors with the name Core i built with the basic architecture named Nehalem. Simply put, this new architecture offers higher performance with lower power consumption settings is much better. There are some things which are the primacy of the Nehalem architecture in General, when compared to the previous Core Architecture:
The incorporation of components
On Nehalem, there are some components that are combined into one inside the processor. The most important thing is the incorporation of the controller memory (RAM) into the processor. Previously, this controller located outside of the processor. With the inclusion of drivers into memory, processor speed the flow of data between the processor and memory become higher.
On Core i3, Core i5, and Core i7 M-M, Intel even put her into the VGA processor. This of course makes the ability to be better than VGA VGA onboard. foregone
Power efficiency, performance-maximizing
On the Core2 Duo (with 2 processors/processor core 2 core), if it is a 3 GHz processor speed, that means the second core processors work with speed 3 GHz. processor When resting, they will drop its velocity at the same time as well.
So, if theres any software that can only use 1 processor core (example: Apple itunes), the two core processors will work on its highest speed (3 GHz). One processor core to work processing data, while others are just raise core speed without processing data.
On the Nehalem, his condition is different. For example on Core i3 (2 core/core 2 processors), the conditions above will only make 1 processor core work and use its maximum speed. While the one unused processor core will still be resting to conserve energy.
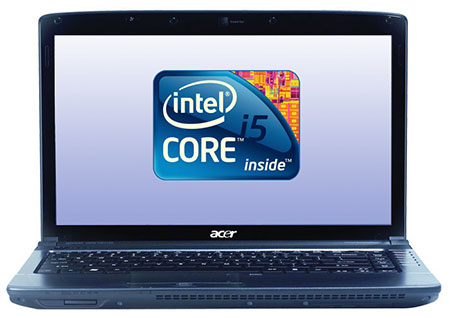
Hyper-threading technology (HT)
Did you know that a processor core is not always "hired" to its full potential? As an analogy, consider a processor with two cores (dual core) is a room with two people in it. When one man asked Cook, both hands will work. However, this person is still able to receive phone calls while cooking, isnt it?
The same thing happened at the core processor. There are parts of the processor core that is unused when a command given to him. The cause is the order may indeed not make use of certain parts of the processor. Then, how can we make use of parts that do not work? Intel named maximizing work processor technologies such as Hyper-threading (HT).
A processor core with HT technology will be recognized by the Operating System (example: Windows7) as the core 2 processors. So, the Operating System can provide 2 work on a processor core. This makes the Nehalem-based processor is able to work more optimally than its predecessor.

Turbo boost
This ability is the flagship feature of most processors with Nehalem technology. The basic idea is HUGI (Hurry Up and Get Idle). His theory is that if a work completed faster, the processor will be able to rest faster and save more energy.
In General, each processor has a maximum power consumption. Lets take the example of Core i5 (2 core processor/core) that limit its consumption is a range about 35 watts. If the VGA memory in the controller and Core i5 consuming 10 W and only 1 processor core that is unused, only consume 22.5 Watt, isnt it? Then, how can get the job done with processors faster, while the software does not use the core 2 available?
The remaining rations power consumption 12.5 W can be used to perform Core i5 Turbo boost. That happens is (on Core i5-430M, 2.2 GHz), a speed of 1 point can be raised up to 2.53 GHz. This is done by utilizing the remaining rations power consumption and having regard to the temperature of the processor. So, the processor will not go beyond the 35W consumption power, and will not heat. Meanwhile, the software can get the job done faster.
Arrandale
What is it? The name was adopted to differentiate from our Core i7 QM with Core i7, Core i5 and Core i3 m. currently, Core i7 Nehalem technology QM still use 45 nm. Even though its huge-powered, 45 nm technology in Core i7 make it work a little more heat. In addition, Core i7 also has no VGA QM in that 4-processor (Quad core).
Arrandale is code for processors Nehalem-based notebook that uses technology for 32 nm and having VGA integrated inside the processor. Currently, only has the Arrandale processor maximum core 2 (dual core). However, performance remains high and the temperature it works tend to be cooler than the Core i7.
Choose which one?
At first glance, the Nehalem technology that belongs to the Core i7, Core i3, and Corei5, already displayed. Well, now, you will choose which one?

Core i7 QM
Notebook processors Core i7 QM has the ability. There is no VGA in this processor, but 4 core processors (quad core), high speed, and Turbo boost is a mainstay. Processors with 4 cores and hyper-threading will be detected as if Windows has 8 processor cores! If you need the highest performance notebook that is even able to compete with desktops, it is her choice. Generally, a notebook with Core i7 will have a special VGA. So, gamers, user graphics applications (Adobe Photoshop, 3ds Max), and high performance lovers will love it. Of course, there is a price to be paid for this high performance.
This is the Arrandale processors (core 2 processor) with the best performance. 32 nm technology to make it work with relative low temperatures. High speed, Hyper-threading, Turbo boost and make it has a high performance. When combined with additional VGA, notebook-based Core i7 M would be an excellent choice for lovers of high-performance. His ability can even compete with Core i7 QM. Of course, with a relatively more affordable price.
Core i5 M
Notebook with this processor did have a 2 core processor (dual core). However, the availability of Hyper-threading makes it appear as if it has 4 core processors. Turbo boost into its flagship in terms of performance. In the meantime, already insufficient to counter VGA playback HD movies 1080p, Blu-Ray movies even. If necessary, some lightweight 3D games can range. If you want high performance with good mobility, Core i5 is a good choice. The price is not suffocating.
Core i3 M
Although not equipped with Turbo boost, the Core i3 performance still Captivate. Hyper-threading makes its ability to be used to its full potential. VGA-his are more reliable than previous onboard VGA. If youre still wanting the performance of the best architecture, Intel Core i3 is a far superior option than the Core2 Duo.
Testing Brief
Here are the results of a comparison between the Core2 Duo T6600 with Core i3 and Core i5-330-430

Software which is a simulation of the use of various applications (MS Office, Adobe, 3ds Max, MS Outlook, etc.) shows that even Core i3 330 easily defeated the Core2 Duo T6600.

Software similar to this more focussing on SYSmark simple application commonly used notebooks. Ujinya results are not much different from the previous ones.
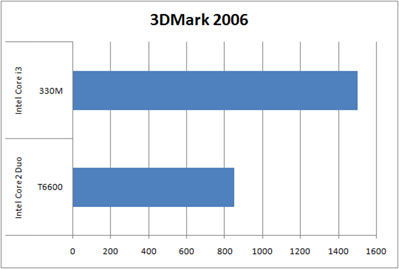
3DMark 2006 is a free test of graphics capabilities. From this it appears that testing Core i3 330M alone is winning more than 50% over VGA onboard the paired on the Core2 Duo T6600 (WXGA Intel GMA).
Canon MP258 Error E13
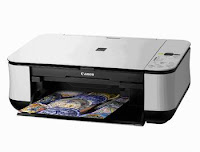
This time we will discuss Canon MP258 printer Error E13. This incident may be quite confusing for those who have never experienced it. OK just go ahead and go to the point.
Early indications:
When the printer is turned on the LCD panel shows the numbers 1 and looks OK, but after the print command, then it will show up on this error E13 MP258. These images appeared on the screen monitor wrote:

How To Resolve Canon MP258 printer Error E13:
- If error E13 appears with the image above, it means that cartridge color need reset (experience run out).
- Press the STOP/RESET LCD panel a little long to spin, then release.
- If the error appears again, E13 means black cartridge also need reset (experience run out), and the picture is as follow:
- Do the same: press the STOP/RESET LCD panel a little long to spin, then release.
- Completed, Canon MP258 printer Error E13 will be normal again.
Good luck
Subscribe to:
Comments (Atom)
