Showing posts with label a. Show all posts
Showing posts with label a. Show all posts
Friday, November 21, 2014
OneDrive and Outlook have a new more secure encryption system
We always feel good that companies improve safety in the services offered to consumers.
Today well talk about Microsoft,they are adding a new encryption support for OneDrive and Outlook, this also coincides with the opening of its firstTransparency Center.
Specifically the new encryption support is calledPerfect Forward Secrecy.
This new system will be available in OneDrive and mobile applications.With this extra level of security Microsoft wants to put things more difficult for attackers, cost more to decipher the connections between their systems andOneDrive.
Outlook also have this system ofencryption.Now when you send an email to someone this email be encrypted, and therefore bebetter protected as it passes from Microsoft servers to other providersemail.
Regarding Transparency Center was opened on the campus in Redmond Washington.
This center is created to give different government agencies revivalist a simple way to the source of many of the products codedsoftwarefrom Microsoft, the endis to show that there is no security or back-doors that may compromise their use.
In the future,Microsoftplans to open more centers Transparency Sites.
Anything to improve services and protect more the user either with better privacy policy or improving the security is good.
Sometimes companies are not very transparent with users, we believe this is not good.So you know, if you are users of these two services from Microsoft, from now on your emails and documents that you may keep in OneDrive be more protected.
Do you regularly and OneDrive You use Outlook?

Monday, November 17, 2014
Auto Sound Systems One Piece at a Time
Those who are in the market for auto sound systems are probably well aware of the many decisions that need to be made throughout the process. Gone are the days when you went in, pointed to a box and walked out with all the pieces, parts, and components you would ever need for a really kickin sound. The truth of the matter is that there are many pieces and parts that work together in order to create the ultimate sound system and everyone seems to have different requirements, styles, tastes, and budgets to work with.
Because of this, many manufacturers of auto sound systems have wised up to the fact that some people will buy the components they need to create the sound system of their dreams piece by piece as budgets allow. This is actually a very intelligent way for customers on a budget to buy the sound system they are hoping to some day have. As a result you will find that speakers, amplifiers, sub woofers, and the actual stereo are often sold separately and at very reasonable prices.Most of us hate living within limited budgets but understand that often in life it is a necessary evil. Living on a budget is not such a terrible thing really. If we had everything we wanted, what on earth would there be to look forward to? At least that is what I keep telling myself. I, however, seem to be the queen of budget living and bargain hunting. I love little more in life than finding a great deal on an item Ive had my eye on for quite a while and hate little more than finding it cheaper once Ive purchased it. As such, I tend to invest a great deal of time researching any major purchase before taking the plunge. A good auto sound system by this I mean good quality, minimal features is going to run (total package and installation) at least $1,000 with many costing a good deal more than that.
That doesnt mean you need to have a thousand bucks lying around the house in order to begin building your auto sound system. You can buy a decent set of speakers for around $200-$260 if you desire. You can find sets at lower prices, but this is the price for a fairly decent set of speakers that should serve you well. Keep in mind that you could very easily spend a lot more than this on speakers if you arent careful. Living on a budget means you have to make some sacrifices along the way in order to have the things you want in life. Buy the speakers and have them installed (if you can do it or your know someone who can, this will save a lot of time and money).
Once you have the first component, whichever one that may be (that choice is entirely up to you and largely dependent on your personal tastes and which need replacing worse in the vehicle you own) you can begin saving towards the next. You should also consider asking friends and family (who would like to know what to get you for the holidays) to help you reach your smaller goals along the way. Most people are glad to help with specific items if they know what those items are. The point is that this isnt an all or nothing proposition. Take small steps towards your prize and you will find that you are constantly getting one step closer.
Basic Components for a Home Theater
Many people never bother looking into purchasing a home theater through sheer fear of the decisions that may need to be made in the process. Many among these aren’t even sure of exactly which components are included in a home theater or which ones are needed in order to create an effective and entertaining home theater. For this reason, many people simply do not bother going through the process of looking at their options when it comes to these wonderful systems on the market today much less ever bother actually purchasing one.
| Basic Components for a Home Theater |
If you are one of the many who has experienced some degree of confusion when it comes to the individual parts and pieces that are included in a home theater system and what they do, hopefully you will gain a better understanding once you’ve finished reading. The first thing to understand is that there are varying degrees when it comes to home theaters. The following components are the makings of a very basic home theater that will provide excellent functionality. They are not however inclusive of every possible piece or part that could make up a home theater system.
| Speaker Setup |
Off to the basics, the first thing you’ll need when creating a home theater for your family to enjoy is a television. It might seem a little too obvious to some but I have yet to find a box kit that includes a television—mainly because the choice of screen is for many the most personal aspect of selecting a home theater. There are essentially three choices in today’s television market: front projector, rear projector, and plasma. There are variations within each of these and the prices fall anywhere from modest to quite costly. This is the component that most home theater owners spend the most time contemplating and it affects the types of components that will be most effective later on in terms of things such as high definition and other choices you can make.
A receiver is another important component. You will probably have a DVD player or recorder of some sort as part of your system; you may have a Tivo and cable box or satellite and will probably have speakers of some sort for your system. The receiver is the box you plug them all into—it receives all of this inputs and correlates it so to speak. This is the ultimate traffic director when it comes to your home theater and I suggest you spend a good portion of your home theater budget making sure that this is a good quality part.
Speakers are where your sound will flow. One of the best things to me about a home theater is the ability to experience surround sound very similar to what I experience in theaters while having the ability to put my feet up or snuggle under blankets (which simply can’t be achieved in a theater). Speakers come in all shapes and sizes and are also quite personal for some consumers while give and take for others. You can purchase these are part of a kit in order to make the selection process easier.
Finally, you have your DVD player or recorder. If high definition is important to you, you now have that option. If your television isn’t HD ready or capable, I’d pass and go for an older (less expensive) model of DVD player until something more up-to-date is called for. These items are a great start for any home theater and you can build, expand, and upgrade over time for an even better system. Enjoy!
Sunday, November 16, 2014
How to Choose a Business Broadband Service Providers
Whether your business is mostly dependent on net or not, it’s a service that is dependable and trustworthy for completing all your business related tasks. It’s even more important for your business if your business operations depend fully or totally on the net.

Business broadband services provide particularly to large and small businesses. There are some particular needs of the companies that broadband service provider should consider. Business broadband services provides businesses high speed net, come with exclusive on-line plans
When it involves obtaining a business-broadband connection, there are some points that should be consider before choosing a broadband service provider. There are different types of connections; from amongst that are available in the market.
ADSL/DSL and cable are the business broadband connections that are comparatively cheaper whereas being each quick and reliable. This makes them the most effective choice for business broadband.
There are also satellites and wireless business connections and these are comparatively uncommon; primarily as a result they need expensive equipments to work.
When you are considering obtaining a new broadband connection, It is important to ask about the operating system that the service provider is using. Aside from that, you should additionally consider the reputation of the provider; it’s really counts in terms of connection quality as well as client service.
Thebroadband speedis another important factor to be considered. You always go for fast net plan which help to assist you in browsing quickly, and fast file transfer. You’ll be able to achieve a lot of productivity in comparatively less time.
Compare different service providers regarding the usage limit and rates of the broadband service. There are some broadband service providers that offers only limited usage in a month whereas there are others that provide unlimited usage within monthly limit, ADSL/DSL and cable are higher than wireless and Satellite broadband.
There are numerous broadband service providers that give packages, permitting security and backup. They provide a service that enables backing of the PC to a distant location. Email address and internet area are alternative options that are offered in smart business broadband packages. These are principally worth adding services for businesses and are free, or price little.
When selecting your business broadband providing company, its became important to consider that its not judicious to choose a service provider with very low rates as a result of which youll not get all quality services on time. The service is very important because a good broadband service is important for the expansion of companies. It allows quick communication; thence, enhancing the processes as well as rising security.
Friday, November 14, 2014
Iridium Go is a satellite hotspot connecting to Android and iOS

We havent seen a lot of potable hotspots that connects your mobile computing devices from the satellite powers, than a very few limited ones, eventually. But, all that seems to be just an old bedtime story, folks, from the 90s, we are in 2014 and as now the United States based company operating satellite constellations, Iridium has gone officially introducing Go, the global online smartphone access.
The American incorporated makes this time around a great outdoor adventures friendly model, as the Iridium Go will be a very well built and rugged enough device, that can power you connections over satellites, from any slot of the planet, Earth. The unit will be shipped with support for up to five WiFi-enabled electronic products (smartphones, phablets, tablet) at once, to basically make phone calls with four hours limited talk time and even send text messages.
The Go pocket hotspot will also feature a dedicated SOS functionality on board, which will help its users get in contact with the nearest emergency services at a distance of a click. So far so good? To make the news even better for our obsessed Phones people, the new hotspot modem will bring along an application, reportedly named Iridium Go, again for your Android and iOS smartphone or tablets.
Source: Iridium, Engadget
Thursday, November 13, 2014
Samsung goes official with Galaxy S5 LTE A in Korea but thats not it!

Samsung, the South Korean multinational consumer electronics manufacturer has announced a new version of their 2014 front runner model, the Galaxy S5 exclusively for their homeland, Korea. This time the company dubs their new announcement as the brand new Samsung Galaxy S5 LTE-A.
Yes folks, you can guess it from the name, the new LTE-Advanced smartphone from Samsung will have three times faster than standard 4G LTE network connection speeds on board, capable of downloading data at 225Mbps.
But, thats not it, the new smartphone also features a brilliant 2K screen of Super AMOLED WQHD display at 2560 x 1440 resolution with excellent color reproduction, which is four times clearer than a High Definition panel, also representing more than 90% of the Color Gamut at only 0.01 milliseconds response time and 100,000:1 contrast ratio. The new handset also packs a faster processor and improved internals. Like the original Galaxy S5, the new model will also come out of the box with the perforated leather textured back and also sporting the same heart rate sensor on the back of the phone, aside the LED flash and below the primary lens, and a fingerprint reader integrated to the home button in front. The smartphone is also dust and water resistant up to one meter and 30 minutes underwater at IP67-certification ratings. Is this the Samsung Galaxy S5 Prime we were talking about in the past?
So, the new Samsung Galaxy S5 LTE-A will have a Quad-Core Qualcomm Snapdragon 805 chipset, speeding at 2.5GHz, 5.08-inches Super AMOLED Quad High Definition screen of 2560 x 1440 resolution pixels, 16 and 32 gigabytes of internal mass storage options with a three gigabytes of LPDDR3 Random Access Memory, 16 megapixels main camera on the back with Optical Image Stabilization and LED flash light, capable of capturing 4K Ultra High Definition videos, a two megapixels secondary front facer, which can shoot footages at 1080p. There is also Bluetooth 4.0, USB 3.0, Near Field Communication and fourth generation LTE-Advanced network support over the hood. The device will have the same 2,800mAh powered battery and runs Androids version 4.4 KitKat with Samsungs own revamped TouchWiz UX 5.0 and other proprietary new attributes like Geo News, Anniversary Reminder, Health Care, Deep Sleep, and more. The new unit is measured and weighed exactly same at at 142 x 72.5 x 8.1 millimeters in dimensions and 145 grams on mass.
The phone will be available in two new flavors, like Sweet Pink and Glam Red, along with the previously announced shades including, Charcoal Black, Shimmering White, Electric Blue and Copper Gold. This smartphone will come to SKT first, followed by KT and LGU+, later this month for a price of 940500 South Korean Won, that is about 919 United States Dollars, but doesnt looks to cross the Korean shores.
Source: DROID LIFE
Tuesday, November 11, 2014
Olleh is offering South Koreans with Special Edition Samsung Galaxy S5 LTE A

The South Korean multinational consumer electronics manufacturer for smartphones and tablets had announced their years flagship, Galaxy S5, back in February at the Mobile World Congress trade exhibition, in Barcelona, Spain.
While the handset is now available internationally, the Korean firm have decided to refresh their S-series with a more premium and new device that will be exclusively sold to the native South Korean consumers. In this regard, the company went officially announcing the new Samsung Galaxy S5 LTE-A for their home land, just a week back. And now, according to an Italian media, their new deluxe smartphone is getting a brand new Special Edition, again for the countryside customers only (most probably) as it will be marketed by KT Corporation, formerly also known as Korea Telecom with the exclusive "Olleh" branding on the redesigned back cover of the smartphone.
So, whats really making this a standalone? When you buy a new Special Edition Samsung Galaxy S5 LTE-A, you will be getting a smartphone with completely modernized back cover, where now the company gives it an elegant looking diamond-like texture, unlike the perforated leather pattern from the current models, which will be available in three different color options from Black, White to Silver, with other details and trims in a classy looking, Gold shade. Other than the exterior changes and detailing, the smartphone will remain the same with top-end internals including, a Qualcomm Snapdragon 805 processor, 5.08-inches Super AMOLED WQHD screen of 2560 x 1440 resolution display, 16 and 32 gigabytes of internal storage, coupled by 3 GB of RAM, 16 MP camera with OIS, LTE-Advanced radios and running Android 4.4 KitKat. We dont hear any words on the availability and the pricing details.
Source: WEBTREK BETA
Monday, November 10, 2014
LG G3 leaks in a new Press render
.jpg)
The South Korean consumer electronics manufacturers upcoming front runner smartphone has once again showed its face on the web, via courtesy of evleaks from Twitter. But this time we have the phone itself dressed-up well with its front display on, featuring the earlier leaked screens on them.
Its probably the first time the unannounced LG made rumored G3 is making its debut with the companys new improved User Interface layout on board, running over Androids version 4.4 KitKat as heard in the past. According to this leak and our previous reports, the new refreshed Optimus UI from LG will attribute minimal and flat icons, updated added-on elements for the weather forecast widget, transparent on-screen navigation buttons, alongside the tweaked notification drawer with Samsungs TouchWiz User Interface like rounded quick setting toggles.
Lastly, from its back, we again see the redesigned hardware physical buttons setup, that got introduced with the companys 2013 (current) flagship, LG G2, right under the primary camera lens with an unknown sensor on the left and a dual-tone LED flash light towards the right. Remember, LG is holding a Press Conference on 27th and 28th of May in six major cities around the globe, where we expect the firm to announce their next generation "G" smartphone.
Source: evleaks (Twitter)
Sunday, November 9, 2014
LG announced G3 Beat a mid tier smartphone from flagship standards

LG Electronics has announced a new smartphone, lately, named as LG G3 Beat. This new smartphone from the South Korean multinational manufacturer is a middle-tier variant of the companys 2014 front runner handset, G3. The new smartphone announced by LG is said to feature the latest "Floating Arc" metallic design, making the side of the device more smooth and curved, also featuring moderately tapered edges for better comfort and feel on holding the phone in hands, providing extra grip, as seen from their flagship smartphone.
The new phone will save you some amount of cash, when it comes to the devices internal specifications and other attributes, still delivering its users with premium experience and powerful performance. LG G3 Beat will come with its setup of physical hardware buttons configured on the back, again resembling the the construction of their bellwether phone. The new smartphone from LG has already made available in South Korea starting yesterday, where it is also expected to make its debut to other countries including the Europe and the Commonwealth of Independent States, in the upcoming weeks. The unit will be renamed as LG G3 S in these countries, according to the manufacturer.
"Smartphone manufacturers cannot ignore this growing segment of consumers who want the best balance of looks, features, performance and, of course, price. The LG G3 Beat represents our commitment to the mid-tier smartphone market that demands mature technology, proven branding, great innovation and attractive price, all in a single device," said Dr. Jong-seok Park, President and CEO of LG Electronics Mobile Communications Company.
So, the new phone that got unveiled by LG will have a Quad-Core 1.2GHz Qualcomm Snapdragon 400 processor, five-inches High Definition screen of 1280 x 720 resolution display, marked at 294 pixels-per-inch, eight gigabytes of internal mass storage (expandable via microSD card slot), one gigabyte of Random Access Memory, eight megapixels primary shooter on the back with laser auto-focus sensor and LED flash light, a 1.3 megapixels front facing secondary snapper. For connectivity, the phone supports, Wi-Fi b/g/n, Bluetooth 4.0, A-GPS/Glonass, NFC, USB 2.0, 4G LTE and HSPA+ network capability. The device sports a removable 2,540mAh powered battery and runs Androids version 4.4.2 KitKat under LGs customized simplified User Interface. Other software features embrace, Touch & Shoot, Smart Keyboard, QuickMemo+, Gesture Shot, etc.
LG manufactured G3 Beat is measured at 137.7 x 69.6 x 10.3 millimeters in dimensions and weighs, 134 grams on mass. You can grab the phone in Metallic Black, Silk White and Shine Gold color options.
Source: LG
Tuesday, November 4, 2014
Xtouchs EPhone is a Mini Phone and a Bluetooth Headset 2 IN 1

Xtouch new device in town is the EPhone, that is a miniature version of a GSM phone in a compatible Bluetooth headset. The Chinese based company, partnered with Tecsync Technology has gone "Beyond Expectations" , by Introducing a complete phone in the size of a headset.
.png)
The new Xtouch EPhone is interconvertible to Bluetooth mode and SIM card mode, allowing you to slot in a micro-SIM card on board. The EPhone packs MediaTeks MTK6260D Central Processing Unit (CPU), a 0.66-inches OLED screen of 64 x 48 resolution display built-in and 32 megabytes of memory. From the connectivity side, the unit will radio-in Quad-Band 2G GSM networks and Bluetooth 3.0, all powered by a 200mAh battery. Xtouchs EPhone will last for 2 hours of call duration, attributing messaging facilities, alarm reminder, five types of ringtone for selection, in-ear Bluetooth music is available, at a distance of 10 meters away from your smartphone. The whole device measures about 71 x 23.5 x 12.6 millimeters in dimensions and weighs 22 grams on mass.
Ephone will ship in both standard Black and White color options, now available from Souq.com around United Arab Emirates, at price of 139 AED, about 38 United States Dollars, each.
Source: XTOUCH , SOUQ.COM
Thursday, October 30, 2014
Motorola Moto G – How to take a screenshot
You might find yourself wanting to capture the moment on your Moto G, perhaps a special text message, a picture or a web page. No matter the reason, we are going to present you the easy instructions on how to take a Lcdshot with your Moto G. The Moto G Lcdshot method follows the Android standard which is holding the power button down and the volume down button at the same time for 3 seconds. This is the most common method on Android as other devices such as the HTC One, Samsung Galaxy S4, Note 3 and Nexus 7 all use the same Lcdshot method.
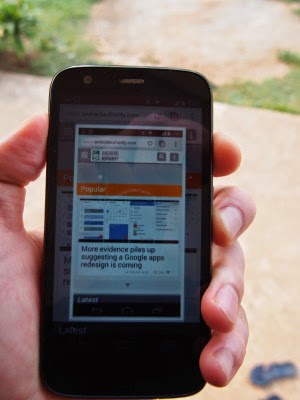
Instructions:
- Hold down the power button and Volume down button at the exact same time for 3 seconds (You may have to try it a few times to get the timing right)
- Wait until you hear a camera snapping sound and you’ll see the Lcd being captured on your phone.
- Go to the Gallery app, then go to Albums to find the Lcdshots folder. In that folder you will see all the Lcdshots that you took.
PRO TIP: I recommend using both your hands when taking the Lcdshot as it’s a bit awkward since the power button and volume buttons are located on the same side of the phone.
If you find yourself having trouble, please feel free to leave a comment below
Wednesday, October 29, 2014
How to make a hidden folder in Desktop
It is one of the most interesting tricks of Windows 7, you can do it also in windows Xp but the process is little different, I will explain it later. To hide a folder without using Folder option in windows 7 is quite easy, what you need to do is create a folder rename it with a
blank character from Character map and after that change the folder icon with blank folder icon. Generally it is not used by users, because it can not hide your folder fully it remains on desktop but not visible until and unless one drag their mouse cursor on the desktop. Since it gets selected when we drag the mouse cursor on desktop it stands useless in hiding a folder. But you can use it as a prank and can show to your friends and have fun. I have learned this from one of my friends and want to share with you, hope you will like this.
blank character from Character map and after that change the folder icon with blank folder icon. Generally it is not used by users, because it can not hide your folder fully it remains on desktop but not visible until and unless one drag their mouse cursor on the desktop. Since it gets selected when we drag the mouse cursor on desktop it stands useless in hiding a folder. But you can use it as a prank and can show to your friends and have fun. I have learned this from one of my friends and want to share with you, hope you will like this.
The process has been discussed in the following segment
1) Create a New Folder
2) Go to Search program and files and search for Character map as shown bellow.

3) Select a Blank character then click select and then copy as shown in the following image.

4) Now rename the folder with the blank character you have copied in step 3, just right click on the folder and select rename and then press Ctrl+V.
5) Now you will see only the folder icon, so we have to hide the icon to make it a fully hidden folder, to do this right click on the folder then go to Customizeand then Change icon and select a blank folder icon as shown in the following image.

6) After selecting the Icon click Ok.
Thus this process makes a folder completely hidden without using Folder option.
Sunday, October 26, 2014
How to Download Videos Online for Free With a Single Click
Got failed in downloading your favorite videos on your PC? Do you need a working tool to solve this problem? If your answer is YES, then I wish you are at the right place. Im going to show you some important online tools which can give the solution for your queries.
Also read: IDA-An alternative to IDM (Internet Download Manager)
Now you can download online videos for free from any website with one click. Lets see how to do it right now.

KeepVid
KeepVid is one of the best websites for downloading videos. You just need to copy the video URL from the address bar of your web browser and paste the link of the video you want to download. Afterwards, click on Download button and within a few moments you will be provided with download links showing many formats of the video such as Mp4, Flv, 3gp, Webm. It also allows you to convert videos to Mp3.

For some sites you are downloading from, KeepVid needs JRE (Java Runtime Environment) for the assistance in fetching download links. So, your PC must be installed with latest version of Java to start downloading any videos.
DownFacebook
Shortly called as Downfacebook which allows you to download Facebook videos for free. This website is similar to above but one correction is that it can fetch only Facebook video links.

Browser Extensions to Download Videos Online
Not interested in copy and paste video URL method? then you should try some best browser plugins alternatively to download the required video with one click. I will mention few browser add-ons for Google Chrome and Mozilla FireFox.

FVD Downloader
FVD Downloader is a popular browser plugin which allows you to download video and audio files from almost any page to save it on your computer. It supports a huge selection of sites including Facebook, Vkontakte, Blip, Metacafe, Dailymotion as well as tons of others. Personally I use this plugin to download videos from Facebook. I can say that it is the best Facebook video downloader online which is available for free to install.

If there is a downloadable video present on the page that you are surfing, the arrow button will turns from grey to blue color (if not, then reload the page). Click on blue arrow button to download video in many file formats if available.
Get extension here:
- For Google Chrome: FVD Downloader.
- For FireFox: Flash Video Downloader.
Video Downloader Professional
Video Downloader Professionalis another Chrome browser extension to download and save videos on PC. I tried it but unable to download videos from Facebook and YouTube. Other than this, its working cool and does what it says.
With the help of this plugin, it is easy to convert the video files for Apple products, DVD, etc. Video Downloader Professional is also acts as "video to Mp3" converter.
Get the extension here:
- For Google Chrome: Video Downloader Professional.
All these browser extensions are working super-fast and also allows you to download Vimeo videos for free. I would recommend you to install both extensions on your browser if you are using Google Chrome.
A Pioneer In Their Own Right The Pioneer Car Stereo
Look at any good car stereo system and you’ll probably see a Pioneer car stereo unit plugged into the console. Alongside with quality speakers and a strong lineup of accessories like LCD panels and navigational devices, Pioneer products/Pioneer car stereos have earned a huge following the world over.
The Pioneer Company is a Tokyo-based corporation, and is one of the world leaders in digital entertainment products. The Pioneer Company was first founded in 1938 in Tokyo as a small radio and speaker repair shop business but today, they are recognized as a leader in technology advancements in the consumer electronics industry.

The company is truly deserving of their name. They are respected for many innovations such as interactive cable TV, the Laser Disc player, developing the first Compact Disc player for the car and the first detachable face car stereo, DVD and DVD recording, plasma display, and organic electroluminescent display. Their strength in optical disc and display technology is complemented by its state-of-the-art software products and manufacturing capabilities.
Nowadays, Pioneer car stereo units are not just simple head units. A car stereo can easily be comprised of several items built into the console of the car. Hardware like navigational devices, DVD players with LCD panels, coupled with the standard array of compact disc, mp3 and cassette players now usually go together. One would be hard-pressed not to acquire all of these, as it is such a delight to see these units work harmoniously. But traditionally, a Pioneer car stereo unit is a head unit with a radio, cassette and cd player. No matter how bare-bones this might sound, anyone will surely be impressed with the sound quality and features a Pioneer car stereo can boot.
Something like the DEH-P90HDD Pioneer car stereo single CD player head unit. The DEH-P90HDD allows you to record CD Audio (from the unit itself or from a changer) onto a 10GB hard disc drive, which holds about 200 audio CDs (using ATRAC3 digital compression). Your CDs are recognized by the pre-installed Gracenote CDDB database, which includes auto-playlists that make finding a specific CD easy. This Pioneer car stereo unit can also play your MP3 CDs plus CD Audio, CD-RW, and CD-R discs. Also, the MagicGate Memory Stick player lets you play recorded Memory Stick tracks. The Organic EL display is easy to read and accepts image downloads, so you can customize its look. Built-in DSP offers a 13-band graphic EQ and a huge variety of tools. The DEH-P90HDD is XM Ready and provides a steering wheel remote.

If cassettes are your thing, the KEH-P4020 Pioneer car stereo cassette player head unit is a good product to choose. It is a full logic cassette system with multi-color display, 45Wx4 High Power, EEQ™ equalizer system, Tuner, IP-Bus System Control, flap face and has a detachable face security.
 If you’re planning to buy a Pioneer car stereo unit, why not match it with a set of Pioneer speakers too? Pioneer car stereo has made another innovation in their REV Series speakers, which incorporates technological breakthroughs in their IASCA award-winning Premier Reference Series (PRS) speakers. Rev Series speakers boast Pioneer’s Kevlar Fiber Composite Cones, Soft-dome tweeters and Wave guides. Each speaker features a bright yellow cone and distinctive wave guides, plus a six-spoke grill with a titanium finish that simulates chrome wheels.
 Monday, October 13, 2014
How to Format a Computer with Windows 7
How to Format a Computer with Windows 7
Warning - Formatting hard drive information does not permanently erase the data. Even after a computer has been formatted, deleted files can be easily recovered. If you want to permanently wipe your hard drive by completely overwritting hard drive data, check out WipeDrive.
To format your hard disk during Windows 7 installation, youll need to start, or boot, your computer using the Windows 7 installation disc or USB flash drive.
1. Turn on your computer so that Windows starts normally, insert the Windows 7 installation disc or USB flash drive, and then shut down your computer.
2. Restart your computer.
3. Press any key when prompted, and then follow the instructions that appear.
4. On the Install Windows page, enter your language and other preferences, and then click Next.
* If the Install Windows page doesnt appear, and youre not asked to press any key, you might need to change some system settings. To learn how to do this, see Start your computer from a Windows 7 installation disc or USB flash drive.
5. On the Please read the license terms page, if you accept the license terms, click I accept the license terms, and then click Next.
6. On the Which type of installation do you want? page, click Custom.
7. On the Where do you want to install Windows? page, click Drive options (advanced).
8. Click the partition that you want to format and click Format.
* If you have more than one partition on this hard drive and want to get rid them to make one big drive again, then select a partition and click on the Delete option for each partition. Once you have deleted all of the partitions, select the Unallocated Space partition and click Format.
9. Pick the formatting option that you want.
10. When youve finished formatting, click Next.
11. Follow the instructions to finish installing Windows 7, which include naming your computer and setting up an initial user account.
* If you do not want to reinstall Windows 7, you can cancel the installation at this point and keep your newly formatted drives.
How to Format a Computer with Windows Vista
Warning - Formatting hard drive information does not permanently erase the data. Even after a computer has been formatted, deleted files can be easily recovered. If you want to permanently wipe your hard drive by completely overwritting hard drive data, check out WipeDrive.
To format your hard disk during Windows Vista installation, youll need to start, or boot, your computer using the Windows Vista installation disc or USB flash drive.
1. Turn on your computer so that Windows starts normally, insert the Windows Vista installation disc, and then shut down your computer.
2. Restart your computer.
3. Press any key when prompted, and then follow the instructions that appear.
4. On the Install Windows page, follow any instructions that are displayed, and then click Install now.
* If the Install Windows page doesnt appear, and youre not asked to press any key, you might need to change some system settings. To learn how to do this, see Start Windows from a CD or DVD.
5. On the Get important updates for installation page, we recommend getting the latest updates to help ensure a successful installation and to help protect your computer against security threats. You will need an Internet connection to get installation updates.
6. On the Type your product key for activation page, do one of the following:
* If you are reinstalling Windows Vista, you should enter your product key now.
* If you are not reinstalling Windows Vista, you can skip this step.
7. On the Please read the license terms page, if you accept the license terms, click I accept the license terms.
8. On the Which type of installation do you want? page, click Custom.
9. On the Where do you want to install Windows? page, click Drive options (advanced).
10. Click the partition that you want to format and click Format
* If you have more than one partition on this hard drive and want to get rid them to make one big drive again, then select a partition and click on the Delete option for each partition. Once you have deleted all of the partitions, select the Unallocated Space partition and click Format
11. When youve finished formatting, click Next.
12. Follow the instructions to finish installing Windows Vista, which include naming your computer and setting up an initial user account.
* If you do not want to reinstall Windows Vista, you can cancel the installation at this point and keep your newly formatted drives.
Read More..
Warning - Formatting hard drive information does not permanently erase the data. Even after a computer has been formatted, deleted files can be easily recovered. If you want to permanently wipe your hard drive by completely overwritting hard drive data, check out WipeDrive.
To format your hard disk during Windows 7 installation, youll need to start, or boot, your computer using the Windows 7 installation disc or USB flash drive.
1. Turn on your computer so that Windows starts normally, insert the Windows 7 installation disc or USB flash drive, and then shut down your computer.
2. Restart your computer.
3. Press any key when prompted, and then follow the instructions that appear.
4. On the Install Windows page, enter your language and other preferences, and then click Next.
* If the Install Windows page doesnt appear, and youre not asked to press any key, you might need to change some system settings. To learn how to do this, see Start your computer from a Windows 7 installation disc or USB flash drive.
5. On the Please read the license terms page, if you accept the license terms, click I accept the license terms, and then click Next.
6. On the Which type of installation do you want? page, click Custom.
7. On the Where do you want to install Windows? page, click Drive options (advanced).
8. Click the partition that you want to format and click Format.
* If you have more than one partition on this hard drive and want to get rid them to make one big drive again, then select a partition and click on the Delete option for each partition. Once you have deleted all of the partitions, select the Unallocated Space partition and click Format.
9. Pick the formatting option that you want.
10. When youve finished formatting, click Next.
11. Follow the instructions to finish installing Windows 7, which include naming your computer and setting up an initial user account.
* If you do not want to reinstall Windows 7, you can cancel the installation at this point and keep your newly formatted drives.
How to Format a Computer with Windows Vista
Warning - Formatting hard drive information does not permanently erase the data. Even after a computer has been formatted, deleted files can be easily recovered. If you want to permanently wipe your hard drive by completely overwritting hard drive data, check out WipeDrive.
To format your hard disk during Windows Vista installation, youll need to start, or boot, your computer using the Windows Vista installation disc or USB flash drive.
1. Turn on your computer so that Windows starts normally, insert the Windows Vista installation disc, and then shut down your computer.
2. Restart your computer.
3. Press any key when prompted, and then follow the instructions that appear.
4. On the Install Windows page, follow any instructions that are displayed, and then click Install now.
* If the Install Windows page doesnt appear, and youre not asked to press any key, you might need to change some system settings. To learn how to do this, see Start Windows from a CD or DVD.
5. On the Get important updates for installation page, we recommend getting the latest updates to help ensure a successful installation and to help protect your computer against security threats. You will need an Internet connection to get installation updates.
6. On the Type your product key for activation page, do one of the following:
* If you are reinstalling Windows Vista, you should enter your product key now.
* If you are not reinstalling Windows Vista, you can skip this step.
7. On the Please read the license terms page, if you accept the license terms, click I accept the license terms.
8. On the Which type of installation do you want? page, click Custom.
9. On the Where do you want to install Windows? page, click Drive options (advanced).
10. Click the partition that you want to format and click Format
* If you have more than one partition on this hard drive and want to get rid them to make one big drive again, then select a partition and click on the Delete option for each partition. Once you have deleted all of the partitions, select the Unallocated Space partition and click Format
11. When youve finished formatting, click Next.
12. Follow the instructions to finish installing Windows Vista, which include naming your computer and setting up an initial user account.
* If you do not want to reinstall Windows Vista, you can cancel the installation at this point and keep your newly formatted drives.
Friday, October 3, 2014
How to Screen Mirror Sony Xperia Z to Show the Screen on a TV
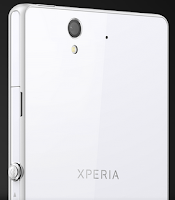
How to mirror the Lcd of your phone on a TV:
1. First you need to turn on the Lcd mirroring function on your TV. Just follow the instructions in the User Guide of your TV.
2. From your Home Lcd, tap on the Menu icon

3. Select on Settings, and tap Xperia™.
4. Choose Screen mirroring.
5. Tap to turn on the Screen mirroring and select a device.
Note: The TV that you want to connect with must support Lcd mirroring for the above described functionality to work. If it does not support, then you can try the Throw feature. Go to Settings > Throw feature.
How to Send a Multimedia Message and Create a Slideshow on HTC Desire U
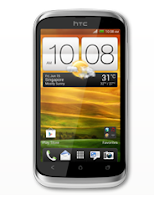
1. On your devices homeLcd, tap on
 and go to Messages.
2. Then tap on

3. On the To Field, key in a contact name, mobile number or email address. You can also send it to a group of friends by tapping on

4. To add a subject line, tap on
 and go to Add Subject.
5. Tap on the box that says Add text and there you can type in your special message.
6. Choose an attachment for your message by tapping on

7. After you browse and select an attachment, tap on Send or press
 to save it as a draft. You can also tap on
 to see options like replacing, viewing and removing your attachment.
Now if you wish your Mutimedia Message to reach an extra mile, you can have it on a slideshow format. Heres how you can create one:
once again and select Slide.2. Then choose where you want to insert the next slide.
3. When youre done adding the next slide, you can either do the following:
- tap onand choose to add a video or a photo
- tap onand then audio if you want to add a voice recording or a music to the slide
- tap on Add Text to add a caption
- tap onto view options like replacing, viewing or removing your attachment.
select Preview. If you dont see Preview, scroll down the menu. To view the playback controls, tap once the preview Lcd.5. When its all set and done, press on or tap on Send to save message as a draft.
or tap on Send to save message as a draft.Now you can make someones day a very special one with this creative and personalize MMS.
Wednesday, October 1, 2014
How to Turn Huawei Ascend G615 a Wi Fi Hotspot
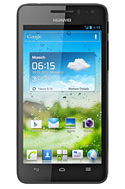
1. On your devices homeLcd touch
 .
.2. Go to Settings.
3. In the Wireless & Networks section, touch More...
4. Then select on Tethering and portable hotspot.
5. And select the Portable WiFi hotspot check box to share your mobile network.
If you want to secure or change your wifi hotspot name, just touch on Configure Wi-Fi hotspot.
Monday, September 29, 2014
How to Find the ESN on a phone HTC EVO
Find the ESN for your HTC EVO is a good idea if you need to reprogram the phone . The ESN or electronic serial number is a unique number that identifies mobile phones. The ESN is usually printed under the battery of the EVO , but you can find the number without the need to remove the battery cover of the phone and battery. The ESN is conveniently located in the phone settings.
Instructions
Read More..
Instructions
- Touch the "Menu" key on the HTC EVO and then tap the icon "Settings" .
- Scroll down to the last field and click " About phone " .
- Tap " Phone Identity " and review the information in the phone . The ESN MEID is the same number listed for the HTC EVO .
Saturday, September 27, 2014
Nokia introduces new range of mobile phones to provide a fast affordable internet experience
Published May 15, 2012 | By Nokia - Press Release
Nokia 110 and Nokia 112 offer Facebook, Twitter, world-class EA games and access to thousands of apps from the Nokia Store
 |
| Nokia 110 |
Karachi, Pakistan - Nokia has today unveiled two new mobile phone models as it continues to accelerate its strategy to connect the next billion consumers to information and the internet. The Nokia 110 and Nokia 112 have been designed to appeal to young, urban consumers who want to experience a fast, affordable online experience.
Both devices are perfect for communicating across Facebook, Twitter and social media networks. The internet experience is also smooth thanks to the Nokia Browser. This innovative technology allows users to consume less data by up to 90%, by compressing websites in the cloud. Both devices offer direct access to Facebook and Twitter from their home screens. The Nokia 112 also features preloaded eBuddy instant messaging service right out of the box, so users can use popular chat services to keep conversations going 24/7.
In common with other Nokia mobile phones, consumers can choose from thousands of apps to download on the Nokia Store. With the upgraded camera, they can now customize their contacts with pictures, and share them with friends via social networks and Bluetooth.
"Todays mobile phone users want a quick internet experience that allows them to discover great content and share it with their friends - but without being held back by high data costs," said Mary T. McDowell, executive vice president, Mobile Phones, Nokia. "The new Nokia 110 and Nokia 112 devices combine browsing, social media, apps, world-class entertainment and long battery life to create a great package for young, urban consumers who want to do it all."
 |
| Nokia 112 |
The devices all feature a generous 1.8" display optimized for a great gaming experience. In the coming months, the Nokia 110 and Nokia 112 will bring free* 40 key EA Games, valued at EUR 75 if bought separately, including well known titles like Tetris®, Bejeweled®, Need for Speed(TM) The Run, Monopoly Here & Now, and SimCity(TM) Deluxe. Consumers will be able to easily access the content by clicking on the Games Gift EA icon on their home screen which will take them to the Nokia Store to download the games. Once they have accessed the offering, they will have 60 days to download the games of their choice, keeping the games forever.
Both new phones offer an improved VGA camera for sharp and clear pictures with support for up to 32GB of external memory, enough for more than 6000+ songs or 90,000 pictures. Consumers can tune into their favorite radio stations and share their favorite songs with friends over Bluetooth. The phones have been optimized to provide a long-lasting battery life, with over 10 hours of talk time and nearly a months standby, meaning that consumers can stay in-touch and entertained all day long. Dual SIM capability
The Nokia 110 and Nokia 112 are both Dual SIM phones, featuring the benefits of Nokias unique and industry leading Easy Swap technology. This enables users to switch between SIMs quickly without having to remove their battery or turn off their phone. The Easy Swap technology can personalize and remember up to five different SIM cards, giving consumers full control over their costs.
The Nokia 110 will also be available as single SIM versions - Nokia 111 and Nokia 113, with this last one available in Europe and Eurasia only.
The estimated retail price for Nokia 110 and its single SIM versions is about EUR 35 and they are expected to start shipping in the second quarter of 2012. The estimated retail price for Nokia 112 is about EUR 38, excluding taxes and subsidies, and is expected to start shipping in the third quarter of 2012.
Subscribe to:
Posts (Atom)