Friday, November 21, 2014
How To Easily Update Samsung Galaxy Tab 4 7 0 T230 for Official Android 4 4 2 KitKat XXU0ANG1 Firmware
So, Here we mention the step by set guide to the firmware manually in the case of automatic update didnt work.

2. Make a manual backup from all data files as well as personal settings stored in the Galaxy tablet.
3. The particular battery level has to be at least 50 percent to avoid electric power interruption during the set up.
4. Now Enable USB debugging mode on the tablet that you can get under the Settings menu.
5. Download the important USB drivers for Galaxy Tab 4 7. 0 T230 Wi-Fi model on the computer. If your Samsung Kies is
already installed on the machine, connect it using any USB cable for installing the drivers.
6. Now you must download the "ODIN flash tool version 3.09" as well as the official Android 4.4.2 XXU0ANG1 KitKat firmware on your personal computer or laptop.
Notice: We are not in charge of any errors that might occur on the device. Read and must follow to the instructions to any avoid issue. Do this at the own risk!!

2. Restart into Download mode by pressing as well as holding volume upwards and power keys simultaneously till the
Smartphone logo appears.
3. Now just Extract the ODIN flash tool files and also the official Android 4.4.2 KitKat firmware for an easy access location on
your p.computer or laptop.
4. Start the ODIN flash tool on the pc.
5. Hook up the Samsung Galaxy Tablet 4 7. 0 on your computer using a USB cable.
6. IDENTITY: COM should turn yellow if device is actually detected by this computer. Otherwise, install the necessary USB drivers as mentionened above.
For the ODIN flash application, select the following files to the installation:
- Click "PDA" then select the file with (CODE) in its name.
- Click "PHONE" then select the file with (MODEM) in its name. If not found, ignore this step.
- Click CSC then select the file with CSC in its name. If you couldnt found. So, dont bother just ignore this step.
- Hit on "PIT" then select the ".pit" file. If not found, ignore this step too.
8. Check on the (AUTO REBOOT) and "F.RESET TIME" on the ODIN flash tool.
9. DO NOT check the RE-PARTITION option within the ODIN flash tool when there is NO ". pit" data file used.
10. Now Click on the start button to start installation for the ODIN tool.
11. After you done the installation, the tablet may restart automatically which could take up five minutes before reaching properly
to the home screen section.
12. In the case tablet reaches the home screen, Now you can unplugged it throughout the USB connection.

Sunday, November 16, 2014
How to Choose a Business Broadband Service Providers
Saturday, November 8, 2014
How To Fix Problems In Windows 7
Another possibility is that your graphics cards drivers need to be updated (this is particularly Likely if you just installed Win7 and are booting into the operating system for the first time). Restart your computer and press the ‘F8 key during the boot process. When the ‘Advanced Boot Options screen appears, use the arrow keys to highlight ‘Enable Low Resolution Video (640x480), press ‘Enter, and wait for Win7 to start. When it does, visit your graphics Card manufacturers Web site and download the latest drivers for your card. Install the drivers And restart Win7. If your computer has integrated graphics instead of a discrete graphics Card, use ‘Windows Update (click ‘Start, click ‘All Programs, and click ‘Windows Update) to obtain the most recent drivers.
When upgrading from Vista, the Win7 installation process stops at 62%:Solution: Win7 can hang at various points during the installation process for different reasons, But one problem occurs more often than others. If your installation stops at precisely 62%, its Likely because a service has stopped responding. To fix the problem, restart your computer And let it roll back to Vista. Once youre back in Vista, click ‘START, right click ‘COMPUTER And click ‘PROPERTIES, Select ‘Advanced System Settings on the left menu. Choose the ‘Advanced tab, click ‘Environment Variables, and click the ‘New button under ‘System Variables.
Next, type ‘MIG_UPGRADE_IGNORE_PLUGINS in the ‘Variable Name field, type ‘IphlpsvcMigPlugin.dll in the ‘Varible Value field, and then click ‘OK. Click ‘OK to close the ‘Environment Variables box, click ‘OK to close the ‘System Properties box, and then shut down your computer. Repeat the Win7 upgrade process.
Youre unable to join a homegroup: Solution: Win7 has eased the home networking process through its use of homegroups, which Help automate network creation. However, if youre unable to join a homegroup on your Network, first make sure that a homegroup actually exists. If the homegroup was created On another computer, check to make sure the homegroup has been created on that computer And that it is turned on. After verifying that the homegroup does exist, check that youre Connected to the network by clicking the Network icon in your Taskbar. If youre not, click ‘Start. Open the ‘Control Panel, click ‘Network and ‘Internet, and open the ‘Network and Sharing Center. Click ‘Connect To A Network and follow the instructions to connect to your Local network.
If youre still unable to connect to the homegroup, make sure your network location is set to ‘Home by opening the ‘Network And Sharing Center, clicking ‘Public Network (or ‘Work Network), and then clicking ‘Home Network. You can also check to see if ‘Network Discovery is turned off, which would prevent you from accessing the home network. In the Left panel of the ‘Network And Sharing Center, click ‘Change Advanced Sharing Settings, Click the ‘Down arrow button to expand the ‘Home Or Work profile, and select the ‘Turn On Network Discovery radio button. Click ‘Save Changes when finished.
If youre still having problems, make sure the required homegroup-related services are Running. Click ‘Start, open the ‘Control Panel, select ‘System And Security, select ‘Administrative Tools, and double click ‘Services (You may be prompted for an Admin password here, so make sure you have it handy before trying this step). Scroll to the ‘Homegroup Provider service under the ‘Name column and make sure "Started" appears under the ‘Status column. If it doesnt, double click the ‘Homegroup Provider entry, click the ‘Start button, and click OK. Repeat this process for the ‘Peer Networking Grouping service.
Windows is unable to install important updates:Solution: In most cases, the Win7 update process is seamless as it downloads and installs Important updates in the background. However, the OS occasionally encounters problems With the update process and cannot install certain updates. If this happens, try manually Updating by clicking ‘Start, clicking ‘All Programs, and clicking ‘Windows Update. In the left pane, click ‘Check For Updates, and then click ‘Install Updates after Windows Finds the important update (or updates) it was previously unable to install. Note that some Updates require you to accept the Microsoft Software License Terms, so be sure to Accept the terms to ensure a successful update installation.
Some updates can require a hefty amount of hard drive capacity, so Windows might have Problems if your primary hard drive is running low on space. If you have 500MB or less Of drive space left, run ‘Disk Cleanup in the ‘Search box, and press ‘Enter. Select Your primary drive (usually C:) in the dropdown menu and click ‘OK. Follow the Instructions to delete unnecessary files.
Win7 returns a message that access is denied when you try to open a file or folder:Solution: If Windows prevents you from opening a file or folder, check that you have Permission to open it. ‘Right click the file or folder, click ‘Properties, choose the ‘Security tab, and click ‘Users under ‘Group Or User Names. Under ‘Permissions, youll see the permissions for ‘Users (as opposed to Administrators) for that particular file or folder. If ‘Read and/or ‘Write are not selected under ‘Allow, youll need to log in with an administrator account to access the file or folder or have the administrator of that computer change the permissions for the file or folder. If you have an admin account, you can choose to change the permissions yourself for your user account. To do so, choose ‘Users, click ‘Edit on the ‘Security tab, click to select the appropriate permissions, and click ‘OK.
Win7 prevents you from logging in to your computer because your user account Is locked out:Solution: If someone tries to log in to your account too many times when using an Invalid password, Win7 will lock the account. Assuming you have a separate admin Account (and it is highly recommended that you do for security purposes), you can Log in to Windows using that administrator account and unlock the user account.
Click ‘Start, type ‘lusrmgr.msc in the ‘Search box, and press ‘Enter to launch The ‘Local Users And Groups utility. Click to select the ‘Users entry in the left pane, And double click the locked account in the right pane. On the ‘General tab, click To deselect ‘Account Is Locked Out, click ‘OK, close the ‘Local Users And Group utility, and log out of Windows . Log back in using the user account.
Win7 does not start after being in Sleep Mode:Solution: Microsofts latest OS includes a wealth of power saving options, but they Dont always work as designed, especially when the OS is paired with certain Motherboards. If Win7 refuses to start after being in Sleep Mode, you can tweak The power options to prevent Win7 from sleeping. Reboot your computer and Open the ‘Control Panel, select ‘System And Security, open ‘Power Options. Next to your selected ‘Power Plan (for example, Balanced), click ‘Change Plan Settings, select ‘Never in the drop down menu beside ‘Put The Computer To Sleep, and then click ‘Change Advanced Power Settings. Click to expand the ‘Sleep entry, click to expand the ‘Allow Hybrid Sleep entry, click ‘On, and change the setting in the drop down menu to ‘Off. Click ‘OK.
If you want your computer to go to sleep after a certain period, this solution will Serve only as a work around. Because this problem is often related to outdated Motherboard software, check your motherboard manufacturers Web site for A BIOS (Basic Input/Output) update.
Youre unable to print from a printer connected to your homegroup:Solution: First, check that the printer is plugged in and turned on. Next, make Sure that the person who connected the printer to the homegroup didnt change The sharing settings, because if the printer is no longer shared, you wont have Access to it through the homegroup. If the printer is active and being shared Through the homegroup, try printing directly to the printer from the computer To which it is connected. If the printer doesnt print from the host computer, Youll need to troubleshoot the printer connection instead of the homegroup Issue. If none of these steps work, try rebooting both the host computer and Your computer. You can also try leaving the homegroup and rejoining.
You cannot open or copy files from the Web:Solution: Win7 is serious about security because plenty of threats exist on the Internet. Traditionally, Microsoft has been the lowest flying fruit for crackers And cybercriminals. When Win7 security controls are set too strictly, they Can prevent you from accessing files on the Web. To fix this problem, click ‘Start, type ‘Internet Options in the ‘Search box, and press ‘Enter. Choose the ‘Security tab, select the ‘Internet zone, and move the slider under ‘Security Level For This Zone to a lower level. For example, if the slider is set to ‘High, move it to ‘Medium High. Click ‘OK when finished.
If youre still having problems opening or copying Web files after changing this Level, move the security slider to a lower level. If this problem is occurring Only with a particular site, return to the ‘Security tab in the ‘Internet Properties dialog box and click the ‘Trusted Sites zone. Next, click the ‘Sites Button , copy the sites URL to the ‘Add This Website To The Zone field, Click ‘Add, click ‘Close, and click ‘OK.
More Win7 problems:
Solution: Microsoft Fix It (support.microsoft.com/fixit) provides a wide range of Automated wizards that run diagnostics on your computer to find and solve issues. So if your experiencing system slow down, they have helpful wizards available.
Wednesday, November 5, 2014
RDSL Remote DSL How to set it up
RDSL
How to setup RDSL or "Remote DSL"
First of all youll need a spare computer and a spare DSL line. These will need to be dedicated solely for your customers use. This means youll need a different computer and internet access for your personal use. Most cities have both DSL and cable modem service available, so get both.
Youll need to get your own DSL modem. The preferred models are the Motorola 2210 (approximately $80 USD) and the Actiontec GT701D (approximately $50 USD).
Some technical info:
When they install your DSL line, they create a name (email address) and password. This is stored in your DSL modem, and thats how it is granted access to the DSL line. This is knows as PPPoE. Later in this article Ill show you how to move the name and password to your computer, instead of on the modem. That way when you want to change the IP address, you simply run a script file that tells Windows to drop the connection, then dial it again. More on this later.
Here are the steps to setup the dedicated computer:
1. Install Teamviewer. Its free for personal use. After you install it send your client the Session ID and password.
2. Put the DSL modem in bridged mode. See the modems user manual for instructions. Click on the links I have provided above to view the manuals.
3. Create a PPPoE network connection under Windows XP. Click here for instrucions. The first time you connect the PPPoE connection you have the option to create a desktop shortcut, and to save the password. Check both.
4. Create a batch file named "ChangeIP.cmd" on the desktop. This is what your client will use to rotate the IP addresses. Also copy this to the following folder: "C:documents and settingsAll UsersStart MenuProgramsStartup"
Here are the contents of the batch file:
rasdial networkname /DISCONNECT
netsh interface ip delete arpcache
PING 1.1.1.1 -n 1 -w 6000 > NUL
rasdial networkname emailaddress password
Definitions:
networkname - the name of the PPPoE connection. More is explained below
emailaddress - The email account created when they installed your DSL line
password - the password associated with the above email address
For example: If your DSL provider is AT&T they will create an email like "john_doe@sbcglobal.net" when you create the PPPoE connection as described below, you would name the network "ATT" or similar, and use john_doe@sbcglobal.net as the username and the proper password to connect.
You can advertise your services for free on http://dsl4rent.com. You can also do a Google search for "remote DSL" and find lots of people who are looking to rent your computer. Also you can shoot me an e-mail and Ill do my best to refer you some customers.
Thursday, October 30, 2014
Motorola Moto G – How to take a screenshot
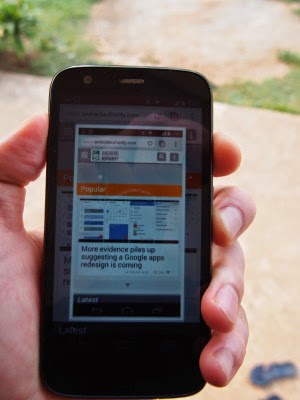
Instructions:
- Hold down the power button and Volume down button at the exact same time for 3 seconds (You may have to try it a few times to get the timing right)
- Wait until you hear a camera snapping sound and you’ll see the Lcd being captured on your phone.
- Go to the Gallery app, then go to Albums to find the Lcdshots folder. In that folder you will see all the Lcdshots that you took.
Wednesday, October 29, 2014
How to make a hidden folder in Desktop
blank character from Character map and after that change the folder icon with blank folder icon. Generally it is not used by users, because it can not hide your folder fully it remains on desktop but not visible until and unless one drag their mouse cursor on the desktop. Since it gets selected when we drag the mouse cursor on desktop it stands useless in hiding a folder. But you can use it as a prank and can show to your friends and have fun. I have learned this from one of my friends and want to share with you, hope you will like this.
1) Create a New Folder


Tuesday, October 28, 2014
How to post your Tweets to Facebook
Post your Tweets to Facebook,click on that



Sunday, October 26, 2014
How to Download Videos Online for Free With a Single Click
Got failed in downloading your favorite videos on your PC? Do you need a working tool to solve this problem? If your answer is YES, then I wish you are at the right place. Im going to show you some important online tools which can give the solution for your queries.
Also read: IDA-An alternative to IDM (Internet Download Manager)
Now you can download online videos for free from any website with one click. Lets see how to do it right now.

KeepVid

DownFacebook

Browser Extensions to Download Videos Online

FVD Downloader

- For Google Chrome: FVD Downloader.
- For FireFox: Flash Video Downloader.
Video Downloader Professional
Video Downloader Professionalis another Chrome browser extension to download and save videos on PC. I tried it but unable to download videos from Facebook and YouTube. Other than this, its working cool and does what it says.
- For Google Chrome: Video Downloader Professional.
How to find shortcuts in Windows 8
and I am the one of those. As I have already said that peoples have lots of issues with Windows 8, specially while its used by new users. Recently I have come across a shortcut issue, which I am going to discuss here. In this tutorial I will discuss the process of showing My Computer and My Document shorcuts on the Desktop.
What to do
You have to follow the following steps to bring the above mentioned shortcuts to your Desktop. Its really very simple.
1) Go to the Desktop
2) Right Click and go to Personalize
3) Click on Change desktop icons
4) Then select your required shortcuts from the available options (You can take the help of following screen shot)

If you get any problem while creating the shortcuts, you can contact me.
Saturday, October 18, 2014
How To Change Folder Colour in Windows
To change the colour of the folder in Windows machine, basic technical knowledge is enough. The supported Windows OSs are Windows XP/7/Vista/8 .
Read: 13 Funny Google Searches!!
So how to change the folder colour in Windows PC?
.png)
Cool. Just follow the simple steps which is given below:
- First, download the Folder Colorizer software app. The download link is given below at the end of this post.
- During the installation of Folder Colorizer, it only asks for the administrator privileges in order to change the systems default folder colour.
- After you have installed this software app, there is no need to open the app manually.
- Select a single folder or else select many folders.
- Right Click on which you want to change the folders colour.
- Browse for "Colorize!".
- This application comes with 8 predefined colours in which you can choose and also it allows you to pick up further more colours. To do that, click on colors...

- Then name your defined colour and also dont forget to click on +Add color in order to add the users defined colour to the task and hence it becomes very handy when next time you want to change the folder colour.
- If you wish to reverse the colour, i.e., if you want to restore the system protected colour, then Right Click on the folder, choose "Colorize" and then do a click on Restore original color.
- Even if you have uninstalled the Folder Colorizer app, the custom colour of the folder wont get changed to default. So you need to manually restore the original colour of the folder by using this app only.
Monday, October 13, 2014
How to Set HTC Desire 816 into Sleep Mode
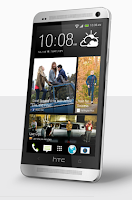 Like any other device, setting HTC Desire 816 into sleep mode will somehow save its battery life. Sleep mode puts your device into a lower power state while the display is off. It also prevents accidental button presses when its in your pocket or bag.
Heres how you can set HTC Desire 816 into sleep mode:
1. Briefly press on your devices Power button to turn off the display. Then switch to Sleep Mode.
2. To change the time before your device sleeps, just go to Display & buttons settings.
3. To wake it up, manually press the Power button and unlock your Lcd.
4. Your device will also automatically wakes up when you have an incoming call.
How to Extend Battery Life of HTC Desire 816
How to Format a Computer with Windows 7
Warning - Formatting hard drive information does not permanently erase the data. Even after a computer has been formatted, deleted files can be easily recovered. If you want to permanently wipe your hard drive by completely overwritting hard drive data, check out WipeDrive.
To format your hard disk during Windows 7 installation, youll need to start, or boot, your computer using the Windows 7 installation disc or USB flash drive.
1. Turn on your computer so that Windows starts normally, insert the Windows 7 installation disc or USB flash drive, and then shut down your computer.
2. Restart your computer.
3. Press any key when prompted, and then follow the instructions that appear.
4. On the Install Windows page, enter your language and other preferences, and then click Next.
* If the Install Windows page doesnt appear, and youre not asked to press any key, you might need to change some system settings. To learn how to do this, see Start your computer from a Windows 7 installation disc or USB flash drive.
5. On the Please read the license terms page, if you accept the license terms, click I accept the license terms, and then click Next.
6. On the Which type of installation do you want? page, click Custom.
7. On the Where do you want to install Windows? page, click Drive options (advanced).
8. Click the partition that you want to format and click Format.
* If you have more than one partition on this hard drive and want to get rid them to make one big drive again, then select a partition and click on the Delete option for each partition. Once you have deleted all of the partitions, select the Unallocated Space partition and click Format.
9. Pick the formatting option that you want.
10. When youve finished formatting, click Next.
11. Follow the instructions to finish installing Windows 7, which include naming your computer and setting up an initial user account.
* If you do not want to reinstall Windows 7, you can cancel the installation at this point and keep your newly formatted drives.
How to Format a Computer with Windows Vista
Warning - Formatting hard drive information does not permanently erase the data. Even after a computer has been formatted, deleted files can be easily recovered. If you want to permanently wipe your hard drive by completely overwritting hard drive data, check out WipeDrive.
To format your hard disk during Windows Vista installation, youll need to start, or boot, your computer using the Windows Vista installation disc or USB flash drive.
1. Turn on your computer so that Windows starts normally, insert the Windows Vista installation disc, and then shut down your computer.
2. Restart your computer.
3. Press any key when prompted, and then follow the instructions that appear.
4. On the Install Windows page, follow any instructions that are displayed, and then click Install now.
* If the Install Windows page doesnt appear, and youre not asked to press any key, you might need to change some system settings. To learn how to do this, see Start Windows from a CD or DVD.
5. On the Get important updates for installation page, we recommend getting the latest updates to help ensure a successful installation and to help protect your computer against security threats. You will need an Internet connection to get installation updates.
6. On the Type your product key for activation page, do one of the following:
* If you are reinstalling Windows Vista, you should enter your product key now.
* If you are not reinstalling Windows Vista, you can skip this step.
7. On the Please read the license terms page, if you accept the license terms, click I accept the license terms.
8. On the Which type of installation do you want? page, click Custom.
9. On the Where do you want to install Windows? page, click Drive options (advanced).
10. Click the partition that you want to format and click Format
* If you have more than one partition on this hard drive and want to get rid them to make one big drive again, then select a partition and click on the Delete option for each partition. Once you have deleted all of the partitions, select the Unallocated Space partition and click Format
11. When youve finished formatting, click Next.
12. Follow the instructions to finish installing Windows Vista, which include naming your computer and setting up an initial user account.
* If you do not want to reinstall Windows Vista, you can cancel the installation at this point and keep your newly formatted drives.
How to Use App Backup on ASUS PadFone Infinity
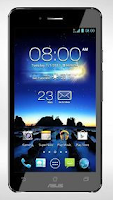
1. On the All apps Lcd, touch on App Backup.
2. Now accept the End User License Agreement.
3. After youve read the welcome message, touch Start to start using App Backup.
4. To back up your apps, tick the apps youd like to back up and determine a Backup Type whether to backup the app data only or both the app and app data.
5. Touch Backup on the upper right corner of the Lcd to start the backup.
6. To restore an app, just touch the Restore List to display the Restore List page.
7. Then touch a backup file you want to restore.
8. And touch OK on the confirmation page to start restoring an app.
Thursday, October 9, 2014
How to Turn On Wi Fi Direct on LG Optimus G Pro
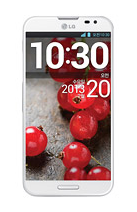
To turn On your Wi-Fi Direct:
- Tap on the Home icon, then the Three Horizontal Line or Settings.
- Select System Settings, then More.
- Tap on Wi-Fi Direct. (A blue check will appear once activated.)
- If you want to create a group, then tap Create Group.
- If you want to search more devices, then tap Search.
How to Fix Error E16 on Canon MP258
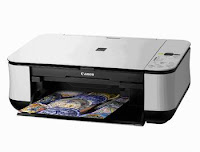 This time we will discuss Error E16 on Canon MP258 Printer. This incident may be quite confusing for those who have never experienced it.
- If error E16 appeared with the image above, it means that the color cartridge need reset (experience the run out).
- Press the STOP/RESET button somewhat longer (5-15 sec) until the LCD panel rotates, then release.
- If the error appears again E13/16 black cartridge, it means also need reset (experience the run out), and the picture is as follow:

- Do the same: press the STOP/RESET LCD panel a little long to spin, then release.
- Finished, the error MP258 printer E16 will be normal again.
Saturday, October 4, 2014
How to Add Applications to the Homescreen on LG G Pro 2
By adding applications on your homeLcd, youre creating a hassle-free phone experience. Important apps or apps that you usually open are accessible if you put it right on your homeLcd instead of going thru lot of tapping and clicking. Now heres how you can add applications that you use most often on your LG G Pro 2 smartphone.To add shortcuts to apps or Widgets on the Home Lcd:
1 Select a location (Home Lcd canvas) to add an item by swiping the Home Lcd from left to right or vice versa.
2 Touch and hold an empty part of the Home Lcd.
3 Tap the type of item you want to add on the Lcd: Apps, Downloads, Widgets, or Wallpapers.
4 Tap the desired App or Widget.
5 You will see a new icon on the Home Lcd.
To place it on a different canvas, touch and hold it to drag it to the desired location and release your finger from the Lcd.
TIP: To add a preloaded application or an application you have downloaded from Play Store to the Home Lcd, simply touch and hold the icon you want in the Apps Lcd and drag it to the desired Home Lcd canvas.
Friday, October 3, 2014
How to Screen Mirror Sony Xperia Z to Show the Screen on a TV
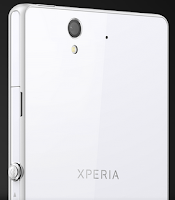
How to mirror the Lcd of your phone on a TV:
1. First you need to turn on the Lcd mirroring function on your TV. Just follow the instructions in the User Guide of your TV.
2. From your Home Lcd, tap on the Menu icon

3. Select on Settings, and tap Xperia™.
4. Choose Screen mirroring.
5. Tap to turn on the Screen mirroring and select a device.
Note: The TV that you want to connect with must support Lcd mirroring for the above described functionality to work. If it does not support, then you can try the Throw feature. Go to Settings > Throw feature.
How to Send a Multimedia Message and Create a Slideshow on HTC Desire U
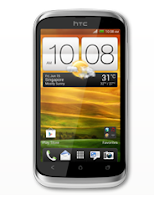
1. On your devices homeLcd, tap on
 and go to Messages.
2. Then tap on

3. On the To Field, key in a contact name, mobile number or email address. You can also send it to a group of friends by tapping on

4. To add a subject line, tap on
 and go to Add Subject.
5. Tap on the box that says Add text and there you can type in your special message.
6. Choose an attachment for your message by tapping on

7. After you browse and select an attachment, tap on Send or press
 to save it as a draft. You can also tap on
 to see options like replacing, viewing and removing your attachment.
Now if you wish your Mutimedia Message to reach an extra mile, you can have it on a slideshow format. Heres how you can create one:
once again and select Slide.2. Then choose where you want to insert the next slide.
3. When youre done adding the next slide, you can either do the following:
- tap onand choose to add a video or a photo
- tap onand then audio if you want to add a voice recording or a music to the slide
- tap on Add Text to add a caption
- tap onto view options like replacing, viewing or removing your attachment.
select Preview. If you dont see Preview, scroll down the menu. To view the playback controls, tap once the preview Lcd. or tap on Send to save message as a draft.Thursday, October 2, 2014
How to Extend Battery Life of Nokia Lumia 520
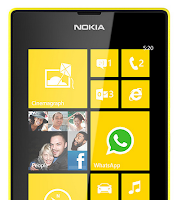
• Turn on the power-saving option on the device. Then lessen the Lcd brightness and the Lcd lock timeout. On the Home Screen, swipe left, then tap on the Gear Icon or Settings > Battery saver.
- Be reminded that when your phone goes into battery saver mode, you may not be able to change the settings of all apps.
- If you want to change the settings of the Battery saver, tap on Advanced.
• Turn down your device volume with the volume keys.
• Close any apps or features when you are done using it so they will not continuously running in the background.
• Turn off the network connection if you are out of range so that your device will stop searching for a network signal.
• You should use the latest version of the software update. Software updates improves some features and fixes some bugs on the previous software version.
• Turn off the camera flash.
• The camera viewfinder can be a power drain, so after youve finished taking photos, press the left arrow key.
Also check: Nokia Lumia 520 Tips and Tricks
Wednesday, October 1, 2014
How to Turn Huawei Ascend G615 a Wi Fi Hotspot
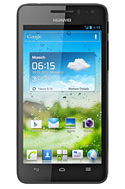
1. On your devices homeLcd touch
 .
.2. Go to Settings.
3. In the Wireless & Networks section, touch More...
4. Then select on Tethering and portable hotspot.
5. And select the Portable WiFi hotspot check box to share your mobile network.
If you want to secure or change your wifi hotspot name, just touch on Configure Wi-Fi hotspot.