Thursday, October 30, 2014
Samsung Break Smartphone Sales in Q2
As a huge cell phone seller, Samsung at all times current new technology in the cell phone merchandise. The newest nice cell phone that produced by way of Samsung mobiles is Samsung Galaxy S III. The authentic quantitys arent out simply yet, however in step with Reuters, Samsung may have damaged the smartphone sales file in whats in any other case considered an attractive slow quarter.
Reuters polled forty one analysts and, in line with their estimates, declare that the Korean company shipped 50 million smartphones in Q2. That would make Samsung an undisputed smartphone chief as the second-placed Apple reportedly skilled a drop in its sales and shipped three0 million gadgets compared to 35 million in Q1.
Undoubtedly the strong efficiency of Samsung is helped by means of the launch of its flagship device - the Galaxy S III, which first turned into available on the finish of May. With the smartphone best discovering its strategy to the United States cabinets in Q3 we must most likely expect more good news from Samsung in three months time.
As for Apple - the demand for the iPhone was naturally weaker in Q2 because its starting to express indicators of age (the 4S used to be already 8 months previous on the finish of the quarter). There are additionally rumors that this has pressured Apple to move the launch of the iPhone 5 to an earlier date, reportedly initially of August, as a substitute of the deliberate October unlock.
The Reuters report additionally factors at Samsung as the Worlds primary cellular telephone manufacturer usually, a title the company clings for a 2nd consecutive quarter after overtaking Nokia in Q1. According to the analysts the Koreans bought a total of 95.8 million cell phones (thats smartphones and featurephones) all the manner in which via Q2, in comparison with the eighty.1 million that Nokia managed.
The bit of fine information for Nokia is that the firm managed to ship three.71 million Windows Phone smartphones, which is a extra than 65% increase over the 2.2 million in the first three months of the yr. If the Finns manage to maintain the identical stage of growth through the 12 months they could be again in the smartphone sport come the vacation quarter.
Motorola Moto G – How to take a screenshot
You might find yourself wanting to capture the moment on your Moto G, perhaps a special text message, a picture or a web page. No matter the reason, we are going to present you the easy instructions on how to take a Lcdshot with your Moto G. The Moto G Lcdshot method follows the Android standard which is holding the power button down and the volume down button at the same time for 3 seconds. This is the most common method on Android as other devices such as the HTC One, Samsung Galaxy S4, Note 3 and Nexus 7 all use the same Lcdshot method.
Instructions:
- Hold down the power button and Volume down button at the exact same time for 3 seconds (You may have to try it a few times to get the timing right)
- Wait until you hear a camera snapping sound and you’ll see the Lcd being captured on your phone.
- Go to the Gallery app, then go to Albums to find the Lcdshots folder. In that folder you will see all the Lcdshots that you took.
PRO TIP: I recommend using both your hands when taking the Lcdshot as it’s a bit awkward since the power button and volume buttons are located on the same side of the phone.
If you find yourself having trouble, please feel free to leave a comment below
Wednesday, October 29, 2014
How to make a hidden folder in Desktop
It is one of the most interesting tricks of Windows 7, you can do it also in windows Xp but the process is little different, I will explain it later. To hide a folder without using Folder option in windows 7 is quite easy, what you need to do is create a folder rename it with a
blank character from Character map and after that change the folder icon with blank folder icon. Generally it is not used by users, because it can not hide your folder fully it remains on desktop but not visible until and unless one drag their mouse cursor on the desktop. Since it gets selected when we drag the mouse cursor on desktop it stands useless in hiding a folder. But you can use it as a prank and can show to your friends and have fun. I have learned this from one of my friends and want to share with you, hope you will like this.
blank character from Character map and after that change the folder icon with blank folder icon. Generally it is not used by users, because it can not hide your folder fully it remains on desktop but not visible until and unless one drag their mouse cursor on the desktop. Since it gets selected when we drag the mouse cursor on desktop it stands useless in hiding a folder. But you can use it as a prank and can show to your friends and have fun. I have learned this from one of my friends and want to share with you, hope you will like this.
The process has been discussed in the following segment
1) Create a New Folder
2) Go to Search program and files and search for Character map as shown bellow.

3) Select a Blank character then click select and then copy as shown in the following image.

4) Now rename the folder with the blank character you have copied in step 3, just right click on the folder and select rename and then press Ctrl+V.
5) Now you will see only the folder icon, so we have to hide the icon to make it a fully hidden folder, to do this right click on the folder then go to Customizeand then Change icon and select a blank folder icon as shown in the following image.

6) After selecting the Icon click Ok.
Thus this process makes a folder completely hidden without using Folder option.
Tuesday, October 28, 2014
How to post your Tweets to Facebook
Today i am going to show you how to link up Twitter and Facebook.
Follow the following steps
1) First Sign in to your Twitter Account and in a another window on your Browser Sign in to your Facebook Page Account.
2) On your Twitter Profile page click on Edit your Profile link,after that you will get a option
Post your Tweets to Facebook,click on that
Post your Tweets to Facebook,click on that

3) After that you will see a link as shown in the following image

4) A window will appear like this click on Log in with Facebook

5) Then Twitter will ask you to permit them for posting on your Facebook Page wall,read it carefully and choose the necessary options and click Allow
6) Now go to your Facebook Page and confirm the Twitter Account Association.You will get that option beside the Photos and Likes tabs of your Facebook page.
----> Now if you add the twitter account to your Blogger account to show the blog post automatically on Twitter,then you will finally get a link among Blog post,Twitter and Facebook.How to link Blogger Account with Twitter
Monday, October 27, 2014
iPod and the Auto Sound System
The iPod story seems to be that of a charmed life. If you havent taken a look around there are all kinds of devices and accessories that are created in order to use right along with the wildly popular and successful iPod product offered by Apple. In fact, I cant think of a better coup for Apple to have pulled off against the giant PC industry, even Microsofts new product the Zune is having a great deal of difficulty even catching up to the sales that iPod seems to have no trouble garnering. The success is something that may define explanation but could have a great deal to do with the equally popular accessories and adornments that are made for each and every iPod product.
 You might be wondering exactly what this has to do with auto sound systems but those are just another of the many great iPod accessories that can be found in the market place of today. Seriously! Even some car manufacturers are having upgrades that include iPod adapters that allow drivers to play music from their iPods through the tuning device on their auto sound systems. It almost seems too good to be true when you consider that you will not have to risk life and limb by fiddling with your iPod device when looking for that one obscure song somewhere on your list. There are other car stereo makers that have devices and adapters that read and play music from the iPod but you must use the actual iPod to make your selections and any changes. At any rate, when carmakers and stereo manufacturers such as Pioneer and Alpine are creating stereos that have the iPod in mind you can rest assured that it is a cultural phenomenon and not some fluke to be taken lightly.
In addition to auto sound systems you will find iDogs, iPets, iPod covers, iPod players (speakers and docking stations that you plug your iPod into in order to play without the headphones), iPod alarm clocks, and my personal favorite iBaby (this is a stroller made by Kolcraft that has an iPod, speakers, and adapter built in so that baby can hear his or her favorite tunes while being strolled about the town), or the iCrib (another nifty iPod device designed to keep baby pacified-hopefully this nifty gadgets are drool proof). Needless to say there are times in life when its all about the accessories and I have yet seen another maker of MP3 type devices hold a torch to iPod when it comes to offering options for buyers to personalize their music makers.
If you are in the market for an auto sound system, chances are that you either already have an iPod or are seriously not opposed to the idea of owning one. If you either or both are in your near future I highly recommend you consider purchasing an auto sound system that will be completely compatible with your iPod system or any other MP3 type player you choose to use. I do believe however, that you will find better options designed with the iPod in mind as none of the other brands (thus far) have nearly the buyer base and purchasing power of iPod owners. No matter how you feel about it, all indications are that iPods are here to stay and you may as well jump on board when it comes to your auto sound system as well.
Sunday, October 26, 2014
How to Download Videos Online for Free With a Single Click
Got failed in downloading your favorite videos on your PC? Do you need a working tool to solve this problem? If your answer is YES, then I wish you are at the right place. Im going to show you some important online tools which can give the solution for your queries.
Also read: IDA-An alternative to IDM (Internet Download Manager)
Now you can download online videos for free from any website with one click. Lets see how to do it right now.

KeepVid
KeepVid is one of the best websites for downloading videos. You just need to copy the video URL from the address bar of your web browser and paste the link of the video you want to download. Afterwards, click on Download button and within a few moments you will be provided with download links showing many formats of the video such as Mp4, Flv, 3gp, Webm. It also allows you to convert videos to Mp3.

For some sites you are downloading from, KeepVid needs JRE (Java Runtime Environment) for the assistance in fetching download links. So, your PC must be installed with latest version of Java to start downloading any videos.
DownFacebook
Shortly called as Downfacebook which allows you to download Facebook videos for free. This website is similar to above but one correction is that it can fetch only Facebook video links.

Browser Extensions to Download Videos Online
Not interested in copy and paste video URL method? then you should try some best browser plugins alternatively to download the required video with one click. I will mention few browser add-ons for Google Chrome and Mozilla FireFox.

FVD Downloader
FVD Downloader is a popular browser plugin which allows you to download video and audio files from almost any page to save it on your computer. It supports a huge selection of sites including Facebook, Vkontakte, Blip, Metacafe, Dailymotion as well as tons of others. Personally I use this plugin to download videos from Facebook. I can say that it is the best Facebook video downloader online which is available for free to install.

If there is a downloadable video present on the page that you are surfing, the arrow button will turns from grey to blue color (if not, then reload the page). Click on blue arrow button to download video in many file formats if available.
Get extension here:
- For Google Chrome: FVD Downloader.
- For FireFox: Flash Video Downloader.
Video Downloader Professional
Video Downloader Professionalis another Chrome browser extension to download and save videos on PC. I tried it but unable to download videos from Facebook and YouTube. Other than this, its working cool and does what it says.
With the help of this plugin, it is easy to convert the video files for Apple products, DVD, etc. Video Downloader Professional is also acts as "video to Mp3" converter.
Get the extension here:
- For Google Chrome: Video Downloader Professional.
All these browser extensions are working super-fast and also allows you to download Vimeo videos for free. I would recommend you to install both extensions on your browser if you are using Google Chrome.
A Pioneer In Their Own Right The Pioneer Car Stereo
Look at any good car stereo system and you’ll probably see a Pioneer car stereo unit plugged into the console. Alongside with quality speakers and a strong lineup of accessories like LCD panels and navigational devices, Pioneer products/Pioneer car stereos have earned a huge following the world over.
The Pioneer Company is a Tokyo-based corporation, and is one of the world leaders in digital entertainment products. The Pioneer Company was first founded in 1938 in Tokyo as a small radio and speaker repair shop business but today, they are recognized as a leader in technology advancements in the consumer electronics industry.

The company is truly deserving of their name. They are respected for many innovations such as interactive cable TV, the Laser Disc player, developing the first Compact Disc player for the car and the first detachable face car stereo, DVD and DVD recording, plasma display, and organic electroluminescent display. Their strength in optical disc and display technology is complemented by its state-of-the-art software products and manufacturing capabilities.
Nowadays, Pioneer car stereo units are not just simple head units. A car stereo can easily be comprised of several items built into the console of the car. Hardware like navigational devices, DVD players with LCD panels, coupled with the standard array of compact disc, mp3 and cassette players now usually go together. One would be hard-pressed not to acquire all of these, as it is such a delight to see these units work harmoniously. But traditionally, a Pioneer car stereo unit is a head unit with a radio, cassette and cd player. No matter how bare-bones this might sound, anyone will surely be impressed with the sound quality and features a Pioneer car stereo can boot.
Something like the DEH-P90HDD Pioneer car stereo single CD player head unit. The DEH-P90HDD allows you to record CD Audio (from the unit itself or from a changer) onto a 10GB hard disc drive, which holds about 200 audio CDs (using ATRAC3 digital compression). Your CDs are recognized by the pre-installed Gracenote CDDB database, which includes auto-playlists that make finding a specific CD easy. This Pioneer car stereo unit can also play your MP3 CDs plus CD Audio, CD-RW, and CD-R discs. Also, the MagicGate Memory Stick player lets you play recorded Memory Stick tracks. The Organic EL display is easy to read and accepts image downloads, so you can customize its look. Built-in DSP offers a 13-band graphic EQ and a huge variety of tools. The DEH-P90HDD is XM Ready and provides a steering wheel remote.

If cassettes are your thing, the KEH-P4020 Pioneer car stereo cassette player head unit is a good product to choose. It is a full logic cassette system with multi-color display, 45Wx4 High Power, EEQ™ equalizer system, Tuner, IP-Bus System Control, flap face and has a detachable face security.
 If you’re planning to buy a Pioneer car stereo unit, why not match it with a set of Pioneer speakers too? Pioneer car stereo has made another innovation in their REV Series speakers, which incorporates technological breakthroughs in their IASCA award-winning Premier Reference Series (PRS) speakers. Rev Series speakers boast Pioneer’s Kevlar Fiber Composite Cones, Soft-dome tweeters and Wave guides. Each speaker features a bright yellow cone and distinctive wave guides, plus a six-spoke grill with a titanium finish that simulates chrome wheels.
 How to find shortcuts in Windows 8
Windows 8 had come out with a bunch of new features and interfaces, but most of the people were disappointed when it leaves the classic Start button, many found it bit more uncomfortable to go through the start screen every time they need a programme to be run. But gradually people are started loving it
and I am the one of those. As I have already said that peoples have lots of issues with Windows 8, specially while its used by new users. Recently I have come across a shortcut issue, which I am going to discuss here. In this tutorial I will discuss the process of showing My Computer and My Document shorcuts on the Desktop.
What to do
You have to follow the following steps to bring the above mentioned shortcuts to your Desktop. Its really very simple.
1) Go to the Desktop
2) Right Click and go to Personalize
3) Click on Change desktop icons
4) Then select your required shortcuts from the available options (You can take the help of following screen shot)

If you get any problem while creating the shortcuts, you can contact me.
and I am the one of those. As I have already said that peoples have lots of issues with Windows 8, specially while its used by new users. Recently I have come across a shortcut issue, which I am going to discuss here. In this tutorial I will discuss the process of showing My Computer and My Document shorcuts on the Desktop.
What to do
You have to follow the following steps to bring the above mentioned shortcuts to your Desktop. Its really very simple.
1) Go to the Desktop
2) Right Click and go to Personalize
3) Click on Change desktop icons
4) Then select your required shortcuts from the available options (You can take the help of following screen shot)
If you get any problem while creating the shortcuts, you can contact me.
Saturday, October 25, 2014
Best Google Chrome Extensions to Enhance Your Web Browsing Experience
Also FireFox,Opera, IE and Safari has already got good reviews, but still Chrome continues to retain its Crown. It is because of its security features with updates. In this post, Im going to express some of the best Google Chrome extensions.
Chromium Wheel Smooth Scroller
While reading online, whenever you scroll down a web page by pressing Page Down keyboard button or by scrolling mouse wheel, it wont be pleasant to your eyes since, you may get skipped to another line. In FireFox, it comes with smooth scroll by default. Now its the time to turn ON the fluid flow scrolling feature by adding a simple Chromium Wheel Smooth Scroller plugin. After you have installed this extension, start to browse the new web page or refresh the current page; you will definitely feel like you are driving a car.

Google Dictionary(by Google)
Dictionary is one of the best tool to learn a foreign language. Google Dictionary is very simple to use. With this extension you can explore the following 3 awesome features:
- Double-click on any word to view its synonym,meaning and definition in a small pop-up bubble.
- Select a word, then click the Google Dictionary tool, (right to the omni box search bar. i.e the toolbar) to view the complete definition.
- Store the history of words you look up to practice those words later on. To do that simply right-click the plugin in the tool bar, then choose options to configure it.

Panic Button
Panic Button is very helpful in case if you want to hide multiple tabs instantaneously. You just need to do a single click on this extension. Afterwards, the Panic Buttons colour turns from red to green and it also shows you how many tabs were hidden currently. The tabs are then saved as bookmarks in a separate folder. Again if you do a click on this extension, it completely restores all the hidden tabs at high speed. If you dont wish to restore all the tabs, then delete the temporary panic folder in Chromes other bookmarks folder. You can also put a password, hence no one can restore the tabs other than you. Therefore, it prevents other users from spying you. It also allows you to hide and restore the tabs by using keyboard short cut. The default short-cut key is F4. You may also change the short-cut key by configuring the Panic Button extension.


Turn OFF the Lights
Turn OFF the Lights is a beautiful extension which is specially made for the users who loves to watch videos online. If you are watching the videos without switching to full screen mode, then use this extension. It makes the background darker which will surely delights your eyes by giving theatre effect. It requires one click mod to Turn Off/On the lights.

Add This-Share & Bookmark
If you love a content, you may want to share it with some one or many to inform them. Social share button is a must for every website to spread the fragrance of the content wider. If you are unable to find the share button or else you want to share a page quickly, then use the Add This extension to share the web page to existing social media services such as Facebook, Twitter, Google+,Tumblr,Digg,Stumbleupon, and the list goes on and on. Alternatively you can share a web page just by right-clicking and choosing Add This from that pages context menu.

Wednesday, October 22, 2014
Self Installation of Auto Sound System can Save Serious Cash
If you are seriously hoping to save a significant chunk of change when it comes to your auto sound system, you should consider saving on installation. Under ordinary circumstances I urge people to be very, if not overly cautious when it comes to installing your own auto sound systems. The thing is, that some people really are talented when it comes to activities such as this. Beyond talent, some people have frightening skills with electronics and if you are one of those, then by all means consider the money you could save yourself (or the extra money youd have to invest in your system?).
We all know that money doesnt grow on trees and when youve been saving up for quite a while to get the sound system you really want its a serious joy killer to have to wait another month or two in order to save up enough money to cover the cost of the installation of your sound system. If you or someone you know and trust (trust being the operative word in this instance) can do the work, it makes no sense from a fiscal point of view to pay someone else to do it.
That being said, if there are any doubts about your skill or experience you might want to at the very least get a second opinion or price installations in your area to see if it might actually be worth saving a little more. Time is another important issue when it comes to the installation of an auto sound system. It doesnt matter how capable you are of making the installation if you simply lack the time to do it. In cases such as this it would have been just as wise to go ahead and pay someone to make the installation. It makes much more sense to me than having the system sitting in a box for months on end while you wait for the time to get it taken care of.
I am one of those people who firmly believes that time is money. Time lost from work is expensive. This is especially true when the times of 10 or more people are lost. It adds up quickly no matter if you have a small or a large company. Time is also (unfortunately) the one commodity in life that you can never recover. No matter how hard you try you cannot recapture time that has been lost. If you have children you know exactly what Im talking about (particularly if your children are either teens or grown and gone). You cannot recover lost time so make sure you arent wasting your time by trying to install an auto sound system that is beyond your abilities.
Dont fret though. Most of us find that at some point in our lives we are limited by either time or money if not both. If everything was quick and easy we wouldnt really have anything worth working for would we? Consider all your limitations when planning and purchasing your auto sound system and make sure that the system you select falls squarely within your ability to install, your time limit for installation, or your price range for affording to pay for the installation. Whether you decide to do your own installation or have a professional installation of your auto sound system the prize is the superior sound quality you will be able to enjoy.
Saturday, October 18, 2014
How To Change Folder Colour in Windows
To change the colour of the folder in Windows machine, basic technical knowledge is enough. The supported Windows OSs are Windows XP/7/Vista/8 .
Read: 13 Funny Google Searches!!
So how to change the folder colour in Windows PC?
.png)
Cool. Just follow the simple steps which is given below:
- First, download the Folder Colorizer software app. The download link is given below at the end of this post.
- During the installation of Folder Colorizer, it only asks for the administrator privileges in order to change the systems default folder colour.
- After you have installed this software app, there is no need to open the app manually.
- Select a single folder or else select many folders.
- Right Click on which you want to change the folders colour.
- Browse for "Colorize!".
- This application comes with 8 predefined colours in which you can choose and also it allows you to pick up further more colours. To do that, click on colors...

- Then name your defined colour and also dont forget to click on +Add color in order to add the users defined colour to the task and hence it becomes very handy when next time you want to change the folder colour.
- If you wish to reverse the colour, i.e., if you want to restore the system protected colour, then Right Click on the folder, choose "Colorize" and then do a click on Restore original color.
- Even if you have uninstalled the Folder Colorizer app, the custom colour of the folder wont get changed to default. So you need to manually restore the original colour of the folder by using this app only.
13 FUNNY GOOGLE SEARCHES
Take a look below and click on the heading link to start the fun.
1.Google Gravity
Google Search logo, search buttons and many Google apps are levitating in the air. Google Gravity make them to fall. After that you can see the logo and all other buttons are swinging slightly. Now what to do? Fight with them throw them from one street to another and punch them!!!

2.Tilt
This make the Google search screen to tilt a little as shown in the picture given below.Click on the image to a enlarged view.


3.elgooG
elooG!! Its looking very funny. elgooG will surprise you. It displays the Google search page contents in a descending order.


4.Weenie Google
Weenie Google plays a superb function in decreasing the size of the text on the Google search homepage

5.Rainbow Google
Here Rainbow Google allows you to get the complete rainbow effect on your Google search. If you just type something, it will also gives you the same colourful effect.

6.Let Me Google That For You
Type something on the search box and click on any button. Finally you will get link. Do you know whats that link? Yeah its the link which hosts what you have typed before. Copy that link and past it on the url search address bar. It will execute what you have typed, in an automatic style. Attract your friends by sharing those link. Just type anything, get the link and then share...!!

7.Google Logo Dancing
Make the Google logo(loco) to start dancing like a cute baby :)


8.Your Name Instead Of Google Logo
Now put your name or some other name and replace the default Google logo with yours. On the step 1 put a name and on the step 2 pick up a font style and finally click on Create My Search Engine button.

9.Google Dark
The background of Google search page is white in colour. Why only white. Here the black background. Make your Google search pages environment darker than ever.
.png)
.png)
10.Google Moon
Now visit the Moon from here. Its interface is looking like using Google map feature. Apollo series included.

11.Google MentalPlex
On the Google MentalPlex page, you can see a spinning circle which is like a hypnotizing gif image. Concentrate on the circle for a few seconds and then click on the circle. Then See the result :P

12.Google Barrel Roll
Roll or rotate the Google search page once in a clockwise direction. Its very stylish and you must try it!!

13.Google Pacman
I think, now its the time to play the Pacman game with two steps to go. Use your keyboards arrow keys for the direction control.

Final Words:
I think I have got a little smile on your face. Now what? Share these tricks with your friends!!
Monday, October 13, 2014
How to Set HTC Desire 816 into Sleep Mode
 Like any other device, setting HTC Desire 816 into sleep mode will somehow save its battery life. Sleep mode puts your device into a lower power state while the display is off. It also prevents accidental button presses when its in your pocket or bag.
Heres how you can set HTC Desire 816 into sleep mode:
1. Briefly press on your devices Power button to turn off the display. Then switch to Sleep Mode.
2. To change the time before your device sleeps, just go to Display & buttons settings.
3. To wake it up, manually press the Power button and unlock your Lcd.
4. Your device will also automatically wakes up when you have an incoming call.
How to Extend Battery Life of HTC Desire 816
The HTC Mini One updated to Android 4 3 Jelly Bean
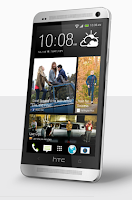
Last October, specifically the 24th, the HTC One received its update to Android 4.3 firmware corresponding Jelly Bean, the last version before the arrival of Android KitKat . Having spent little time since then, now he s the turn of the same to his little brother, the HTC Mini One . Recall that the HTC One, meanwhile receive the upgrade to Android KitKat throughout the month of January 2014.Fue who initiated this new Samsung smartphone segment with the name " mini" . Users tend to believe that , with respect to the "original" device, only vary in size, something that really is not true, since the "mini" incorporate a completely different such "original" smartphone hardware. Without further ado, we focus squarely on the update to Android 4.3 Jelly Bean HTC One mini .
The HTC Mini One is also updated to Android 4.3 Jelly Bean
Surprisingly, while some other high-end manufacturers have yet to upgrade to Android 4.3 Jelly Bean, HTC has bumped the table and has launched its software update for this smartphone range corresponding to the average of the current catalog telephony mobile . Along with an updated version of Google s mobile operating system , Android, come other new software features such as the 5.5 version of Sense , HTC s own interface , and with it , the ability to disable the singular BlinkFeed .
All details of the upgrade to Android 4.3 Jelly Bean Mini HTC One
The history of an upgrade is the list itself changes , along with new software, are introduced. This listing will be able to change it in the following Lcdshot accompanying this publication. In it you can see reflected the issues we cited above and some other minor .
Read More..
The HTC Mini One is also updated to Android 4.3 Jelly Bean
Surprisingly, while some other high-end manufacturers have yet to upgrade to Android 4.3 Jelly Bean, HTC has bumped the table and has launched its software update for this smartphone range corresponding to the average of the current catalog telephony mobile . Along with an updated version of Google s mobile operating system , Android, come other new software features such as the 5.5 version of Sense , HTC s own interface , and with it , the ability to disable the singular BlinkFeed .
All details of the upgrade to Android 4.3 Jelly Bean Mini HTC One
The history of an upgrade is the list itself changes , along with new software, are introduced. This listing will be able to change it in the following Lcdshot accompanying this publication. In it you can see reflected the issues we cited above and some other minor .
How to Format a Computer with Windows 7
How to Format a Computer with Windows 7
Warning - Formatting hard drive information does not permanently erase the data. Even after a computer has been formatted, deleted files can be easily recovered. If you want to permanently wipe your hard drive by completely overwritting hard drive data, check out WipeDrive.
To format your hard disk during Windows 7 installation, youll need to start, or boot, your computer using the Windows 7 installation disc or USB flash drive.
1. Turn on your computer so that Windows starts normally, insert the Windows 7 installation disc or USB flash drive, and then shut down your computer.
2. Restart your computer.
3. Press any key when prompted, and then follow the instructions that appear.
4. On the Install Windows page, enter your language and other preferences, and then click Next.
* If the Install Windows page doesnt appear, and youre not asked to press any key, you might need to change some system settings. To learn how to do this, see Start your computer from a Windows 7 installation disc or USB flash drive.
5. On the Please read the license terms page, if you accept the license terms, click I accept the license terms, and then click Next.
6. On the Which type of installation do you want? page, click Custom.
7. On the Where do you want to install Windows? page, click Drive options (advanced).
8. Click the partition that you want to format and click Format.
* If you have more than one partition on this hard drive and want to get rid them to make one big drive again, then select a partition and click on the Delete option for each partition. Once you have deleted all of the partitions, select the Unallocated Space partition and click Format.
9. Pick the formatting option that you want.
10. When youve finished formatting, click Next.
11. Follow the instructions to finish installing Windows 7, which include naming your computer and setting up an initial user account.
* If you do not want to reinstall Windows 7, you can cancel the installation at this point and keep your newly formatted drives.
How to Format a Computer with Windows Vista
Warning - Formatting hard drive information does not permanently erase the data. Even after a computer has been formatted, deleted files can be easily recovered. If you want to permanently wipe your hard drive by completely overwritting hard drive data, check out WipeDrive.
To format your hard disk during Windows Vista installation, youll need to start, or boot, your computer using the Windows Vista installation disc or USB flash drive.
1. Turn on your computer so that Windows starts normally, insert the Windows Vista installation disc, and then shut down your computer.
2. Restart your computer.
3. Press any key when prompted, and then follow the instructions that appear.
4. On the Install Windows page, follow any instructions that are displayed, and then click Install now.
* If the Install Windows page doesnt appear, and youre not asked to press any key, you might need to change some system settings. To learn how to do this, see Start Windows from a CD or DVD.
5. On the Get important updates for installation page, we recommend getting the latest updates to help ensure a successful installation and to help protect your computer against security threats. You will need an Internet connection to get installation updates.
6. On the Type your product key for activation page, do one of the following:
* If you are reinstalling Windows Vista, you should enter your product key now.
* If you are not reinstalling Windows Vista, you can skip this step.
7. On the Please read the license terms page, if you accept the license terms, click I accept the license terms.
8. On the Which type of installation do you want? page, click Custom.
9. On the Where do you want to install Windows? page, click Drive options (advanced).
10. Click the partition that you want to format and click Format
* If you have more than one partition on this hard drive and want to get rid them to make one big drive again, then select a partition and click on the Delete option for each partition. Once you have deleted all of the partitions, select the Unallocated Space partition and click Format
11. When youve finished formatting, click Next.
12. Follow the instructions to finish installing Windows Vista, which include naming your computer and setting up an initial user account.
* If you do not want to reinstall Windows Vista, you can cancel the installation at this point and keep your newly formatted drives.
Read More..
Warning - Formatting hard drive information does not permanently erase the data. Even after a computer has been formatted, deleted files can be easily recovered. If you want to permanently wipe your hard drive by completely overwritting hard drive data, check out WipeDrive.
To format your hard disk during Windows 7 installation, youll need to start, or boot, your computer using the Windows 7 installation disc or USB flash drive.
1. Turn on your computer so that Windows starts normally, insert the Windows 7 installation disc or USB flash drive, and then shut down your computer.
2. Restart your computer.
3. Press any key when prompted, and then follow the instructions that appear.
4. On the Install Windows page, enter your language and other preferences, and then click Next.
* If the Install Windows page doesnt appear, and youre not asked to press any key, you might need to change some system settings. To learn how to do this, see Start your computer from a Windows 7 installation disc or USB flash drive.
5. On the Please read the license terms page, if you accept the license terms, click I accept the license terms, and then click Next.
6. On the Which type of installation do you want? page, click Custom.
7. On the Where do you want to install Windows? page, click Drive options (advanced).
8. Click the partition that you want to format and click Format.
* If you have more than one partition on this hard drive and want to get rid them to make one big drive again, then select a partition and click on the Delete option for each partition. Once you have deleted all of the partitions, select the Unallocated Space partition and click Format.
9. Pick the formatting option that you want.
10. When youve finished formatting, click Next.
11. Follow the instructions to finish installing Windows 7, which include naming your computer and setting up an initial user account.
* If you do not want to reinstall Windows 7, you can cancel the installation at this point and keep your newly formatted drives.
How to Format a Computer with Windows Vista
Warning - Formatting hard drive information does not permanently erase the data. Even after a computer has been formatted, deleted files can be easily recovered. If you want to permanently wipe your hard drive by completely overwritting hard drive data, check out WipeDrive.
To format your hard disk during Windows Vista installation, youll need to start, or boot, your computer using the Windows Vista installation disc or USB flash drive.
1. Turn on your computer so that Windows starts normally, insert the Windows Vista installation disc, and then shut down your computer.
2. Restart your computer.
3. Press any key when prompted, and then follow the instructions that appear.
4. On the Install Windows page, follow any instructions that are displayed, and then click Install now.
* If the Install Windows page doesnt appear, and youre not asked to press any key, you might need to change some system settings. To learn how to do this, see Start Windows from a CD or DVD.
5. On the Get important updates for installation page, we recommend getting the latest updates to help ensure a successful installation and to help protect your computer against security threats. You will need an Internet connection to get installation updates.
6. On the Type your product key for activation page, do one of the following:
* If you are reinstalling Windows Vista, you should enter your product key now.
* If you are not reinstalling Windows Vista, you can skip this step.
7. On the Please read the license terms page, if you accept the license terms, click I accept the license terms.
8. On the Which type of installation do you want? page, click Custom.
9. On the Where do you want to install Windows? page, click Drive options (advanced).
10. Click the partition that you want to format and click Format
* If you have more than one partition on this hard drive and want to get rid them to make one big drive again, then select a partition and click on the Delete option for each partition. Once you have deleted all of the partitions, select the Unallocated Space partition and click Format
11. When youve finished formatting, click Next.
12. Follow the instructions to finish installing Windows Vista, which include naming your computer and setting up an initial user account.
* If you do not want to reinstall Windows Vista, you can cancel the installation at this point and keep your newly formatted drives.
How to Use App Backup on ASUS PadFone Infinity
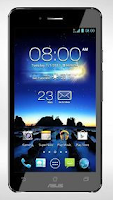
1. On the All apps Lcd, touch on App Backup.
2. Now accept the End User License Agreement.
3. After youve read the welcome message, touch Start to start using App Backup.
4. To back up your apps, tick the apps youd like to back up and determine a Backup Type whether to backup the app data only or both the app and app data.
5. Touch Backup on the upper right corner of the Lcd to start the backup.
6. To restore an app, just touch the Restore List to display the Restore List page.
7. Then touch a backup file you want to restore.
8. And touch OK on the confirmation page to start restoring an app.
Friday, October 10, 2014
Samsung Galaxy Express Tips and Tricks
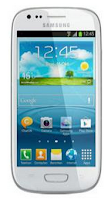
Here are some How Tos for your Samsung Galaxy Express. These How Tos are still not yet complete and I am still working on the others:
How to Factory Reset (Hard Reset) Samsung Galaxy Express
We have our own reasons why we factory reset our device. Maybe we want to delete all the files and restore the device to its original state. It could also be the device may be malfunctioning or so slow and it needs to be reset.
The steps below are the instructions on how to factory reset your Samsung Galaxy Express:
Step 1. On your HomeLcd, tap on MENU icon.
Step 2. Select "Settings", then scroll down and tap "Backup and reset" option.
Step 3. Then tap on “Factory Data Reset”.
Step 4. Read warning carefully before tapping the “Reset Device”.
Step 5. If you want to proceed in resetting your device, tap on “Delete All” to confirm the Reset.
Now, you just need to wait while your device is resetting. It should reboot itself and you will have a new start on your Samsung Galaxy Express.
Now, you just need to wait while your device is resetting. It should reboot itself and you will have a new start on your Samsung Galaxy Express.
You may also use the shortcut method using the code: Enter *2767*3855# on your device.
Hard Reset:
How to Import Contacts From Old Phone to New Phone (on Sony, iPhone, Samsung, HTC and Nokia)
All of us want to have a longer battery life on our phones. Well, Samsung Galaxy Express provides options that help you save battery power. By customizing these options and deactivating features in the background, you can use the device longer between charges:
Adding Widgets on your HomeLcd will help you improve your productivity in using your Samsung Galaxy Express. If you dont know what widgets means, Widgets are small applications that you can directly use on your HomeLcd. These will serve as your shortcut icon so will no longer need to access the Menu.
- Press and hold the Power button, Volume Up and the Home Key at the same time.
- Hold these buttons until your phone vibrates, then release the Power button.
- Hold the Volume Up and the Home Key until you see the Android icon.
- Then choose the Factory Reset option.
How to Import Contacts From Old Phone to New Phone (on Sony, iPhone, Samsung, HTC and Nokia)
Contacts is very important for everyone of us. We cant connect to our friends without a contact number. If you have a new phone, saving contacts on the phone one by one is so hassle. But now, theres an easy way how to transfer or import your contacts from your old phone to your new phone.
Use your PC to transfer contacts to your new phone. This process is applicable in several phone brands, including iPhone, Samsung, HTC and Nokia.
You just need an Internet Connection on your PC, your old and new phone and their own USB cable.
If you are not prompted with a pop-up window to install the PC Companion, you can also download the PC Companion here.
How to Reduce the Battery Consumption on Samsung Galaxy Express
Use your PC to transfer contacts to your new phone. This process is applicable in several phone brands, including iPhone, Samsung, HTC and Nokia.
You just need an Internet Connection on your PC, your old and new phone and their own USB cable.
Then you need to install the PC Companion program. This is a free application and the installation files are already saved on your new phone. This program can also be used in updating your phone software.
Please note that if you are using the Microsoft Windows 7 operating system on your PC, make sure that the AutoPlay setting is enabled.
To check your settings:
Click Start > Control Panel, then type "autoplay" on the search box. Click the AutoPlay, and mark the check box Use AutoPlay for all media and devices.
Installing the PC Companion:
Installing the PC Companion:
- Turn on your new Phone and connect it to your PC.
- On your new Phone, tap "Install" to install PC Companion on the PC.
- On your computer, if a pop-up window that appears notifies you about available PC Software, select Run Startme.exe.
- Then click Install to start the installation and then follow the instructions to complete the installation.
If you are not prompted with a pop-up window to install the PC Companion, you can also download the PC Companion here.
Transferring your contacts to your new phone:
- Make sure that PC Companion is installed on your PC.
- Open the PC Companion application on your PC.
- Then click Contacts Setup and follow the instructions to transfer your contacts.
How to Reduce the Battery Consumption on Samsung Galaxy Express
All of us want to have a longer battery life on our phones. Well, Samsung Galaxy Express provides options that help you save battery power. By customizing these options and deactivating features in the background, you can use the device longer between charges:
To reduce the battery consumption, follow these simple tips:
● Switch to Sleep mode by pressing the Power key when you are not using your device.
● Close unnecessary applications with the task manager.
● Deactivate the Bluetooth feature.
● Deactivate the Wi-Fi feature when not in use.
● Deactivate auto-syncing of applications.
● Decrease the backlight time.
● Decrease the brightness of the display.
● Activate Power saving mode.
● Switch to Sleep mode by pressing the Power key when you are not using your device.
● Close unnecessary applications with the task manager.
● Deactivate the Bluetooth feature.
● Deactivate the Wi-Fi feature when not in use.
● Deactivate auto-syncing of applications.
● Decrease the backlight time.
● Decrease the brightness of the display.
How to Reformat Memory Card on Samsung Galaxy Express
Formatting the memory card on your Samsung Galaxy Express will delete all the files that is stored on the memory card. It is recommended to backup your important files on your computer before attempting to format your memory card.
You may not be able to reformat your memory card on your computer. So try it through your device:
1. On your Home Lcd, tap Apps.
2. Select Settings.
3. Go to Storage.
4. Then tap Format SD card > Format SD card.
5. Tap Erase everything to confirm the action.
How to Secure Your Samsung Galaxy Express (Face Unlock, Face and Voice Unlock, Pattern and Password)
How to Upgrade With the Latest Software on Samsung Galaxy Express
Keeping your device updated with the latest software fixes bugs on your handset thus contributing to its efficiency and life span. Samsung allows you to install those updates in two ways- through Samsung Kies or Over-the-Air. Well heres how you can install those latest software firmware using this two methods.
Upgrading with Samsung Kies
1. First launch Samsung Kies.
2. Then connect your phone to the computer using the USB cable that came with it.
3. Now Samsung Kies will automatically recognizes your device and a dialogue box
appears showing the available updates, if any.
4. Click the update button in the dialogue box to start upgrad ting to te latest software.
While youre upgrading the device, you shouldnt turn off the computer or disconnect
te USB cable and dont connect other media devices to the computer as it may interfere
the upgrading process.
Upgrading over-the-air
1. Go the Applications Lcd and then tap Settings.
2. Then go to About device.
3. Select Software Update then hit on Update.
How to Make Your Samsung Galaxy Express a Portable Wi-Fi Hotspot
Smartphones these days can now share its mobile data connection and act as a portable Wi-Fi hotspot. And like those high-end gadgets, Samsung Galaxy Express is sure to let you experience the benefits of making it as a portable Wi-Fi hotspot. Heres how you can make your Samsung phone the next Wi-Fi hotspot.
1. On your device, go to Settings Lcd first.
2. Then tap More options.
3. Go to Tethering and portable hotspot.
4. And choose Portable Wi-Fi hotspot to share the devices mobile network connection.
Select Advanced options to customize your Wi-Fi settings.
And you now have a portable Wi-Fi hotspot using your Samsung Galaxy Express.
How to Install and Uninstall Apps on Samsung Galaxy Express
Formatting the memory card on your Samsung Galaxy Express will delete all the files that is stored on the memory card. It is recommended to backup your important files on your computer before attempting to format your memory card.
You may not be able to reformat your memory card on your computer. So try it through your device:
1. On your Home Lcd, tap Apps.
2. Select Settings.
3. Go to Storage.
4. Then tap Format SD card > Format SD card.
5. Tap Erase everything to confirm the action.
Securing your Samsung Galaxy Express is also important, specially if you have a private files that you dont want others to access it. So to prevent others from using your or accessing your personal data without your permission, then you may need to activate the security features. The device requires an unlock code whenever unlocking it.
Setting a face unlock:
1. On the Applications Lcd, tap Settings.
2. Select Lock Lcd.
3. Then choose Screen lock.
4. Tap Face unlock.
Fit your face in the frame to be captured. Then, set a backup unlock PIN or pattern to unlock the Lcd in case the face unlock fails.
Setting a face and voice unlock:
1. On the Applications Lcd, tap Settings.
2. Select Lock Lcd.
3. Then choose Screen lock.
4. Tap Face and voice.
Fit your face in the frame to be captured and then set a voice command. Then, set a backup unlock PIN or pattern to unlock the Lcd in case the face and voice unlock fails.
Setting a pattern:
1. On the Applications Lcd, tap Settings.
2. Select Lock Lcd.
3. Then choose Screen lock.
4. Tap Pattern.
Draw a pattern by connecting four dots or more, and then draw the pattern again to verify it. Set a backup unlock PIN to unlock the Lcd when you forget the pattern.
Setting a PIN:
1. On the Applications Lcd, tap Settings.
2. Select Lock Lcd.
3. Then choose Screen lock.
4. Tap PIN.
Enter at least four numbers, and then enter the password again to verify it.
Setting a password:
1. On the Applications Lcd, tap Settings.
2. Select Lock Lcd.
3. Then choose Screen lock.
4. Tap Password.
Enter at least four characters including numbers and symbols, and then enter the password again to verify it.
How to Upgrade With the Latest Software on Samsung Galaxy Express
Keeping your device updated with the latest software fixes bugs on your handset thus contributing to its efficiency and life span. Samsung allows you to install those updates in two ways- through Samsung Kies or Over-the-Air. Well heres how you can install those latest software firmware using this two methods.
Upgrading with Samsung Kies
1. First launch Samsung Kies.
2. Then connect your phone to the computer using the USB cable that came with it.
3. Now Samsung Kies will automatically recognizes your device and a dialogue box
appears showing the available updates, if any.
4. Click the update button in the dialogue box to start upgrad ting to te latest software.
While youre upgrading the device, you shouldnt turn off the computer or disconnect
te USB cable and dont connect other media devices to the computer as it may interfere
the upgrading process.
Upgrading over-the-air
1. Go the Applications Lcd and then tap Settings.
2. Then go to About device.
3. Select Software Update then hit on Update.
How to Make Your Samsung Galaxy Express a Portable Wi-Fi Hotspot
Smartphones these days can now share its mobile data connection and act as a portable Wi-Fi hotspot. And like those high-end gadgets, Samsung Galaxy Express is sure to let you experience the benefits of making it as a portable Wi-Fi hotspot. Heres how you can make your Samsung phone the next Wi-Fi hotspot.
1. On your device, go to Settings Lcd first.
2. Then tap More options.
3. Go to Tethering and portable hotspot.
4. And choose Portable Wi-Fi hotspot to share the devices mobile network connection.
Select Advanced options to customize your Wi-Fi settings.
And you now have a portable Wi-Fi hotspot using your Samsung Galaxy Express.
Apps developers are remarkably making good money out of every apps they build. No wonder online stores are mostly visited by smartphone users just to check on the hottest new apps online. If youve found the perfect app for your Samsung Galaxy Express, then follow these steps in installing and perhaps uninstalling those unwanted apps.
Installing apps
1. First tap on Play Store on the applications Lcd to view available apps online.
2. You can browse available apps by category or simply tap to search with a keyword.
3. Then select an application to view. To download it on your phone, tap Install. Make sure to double check the app info like its price and ratings before hitting the install button.
4. If theres a charge for that app,tap the price and follow the onLcd instructions to purchase it.
5. To install apps that are from other sources, just go to Applications > Settings > Security > Unknown sources.
Uninstalling apps
1. In uinstalling the apps purchased from the Play Store, tap
2. Then go to My Apps.
3. And select an application you want to delete, then tap Uninstall.
Installing apps
1. First tap on Play Store on the applications Lcd to view available apps online.
2. You can browse available apps by category or simply tap
to search with a keyword.3. Then select an application to view. To download it on your phone, tap Install. Make sure to double check the app info like its price and ratings before hitting the install button.
4. If theres a charge for that app,tap the price and follow the onLcd instructions to purchase it.
5. To install apps that are from other sources, just go to Applications > Settings > Security > Unknown sources.
Uninstalling apps
1. In uinstalling the apps purchased from the Play Store, tap
2. Then go to My Apps.
3. And select an application you want to delete, then tap Uninstall.
How to Add and Remove Widgets on Samsung Galaxy Express
Adding a Widget:
1. Press Home key button.
2. Navigate to the desired Home Page.
3. Touch and hold on an empty area of the Lcd.
4. Tap Apps and widgets.
5. Tap the Widgets tab at the top of the Lcd.
6. Press and hold an available Widget to position it on the current Lcd.
Removing a Widget:
1. Touch and hold a Widget until you can move it around on the Lcd.
2. Drag the Widget over the Delete icon it.
As you place the Widget into the Trash, both items turn red.
How to Play Movies & TV on Samsung Galaxy Express
With the use of Google Play Movies & TV app, you can now rent thousands of different movies and television shows. You have an option to watch the movies directly on your phone instantly, or you can also download it and watch it later if you have spare time. Just follow the steps below on how to play movies and tv.
1. From the Home Lcd, tap on Apps icon, and select Movie icon or the Play Movies & TV.
.
2. You need to log on to your Google account if you have not already done so.
3. Just follow the on-Lcd instructions for renting and viewing movies.
4. Tap the MOVIES tab to view movies you can rent.
5. Tap the TV SHOWS tab to view shows you can rent.
6. Tap the PERSONAL VIDEOS tab to view movies you have on your phone or memory card.
7. Press for additional options.
for additional options.
Subscribe to:
Comments (Atom)